
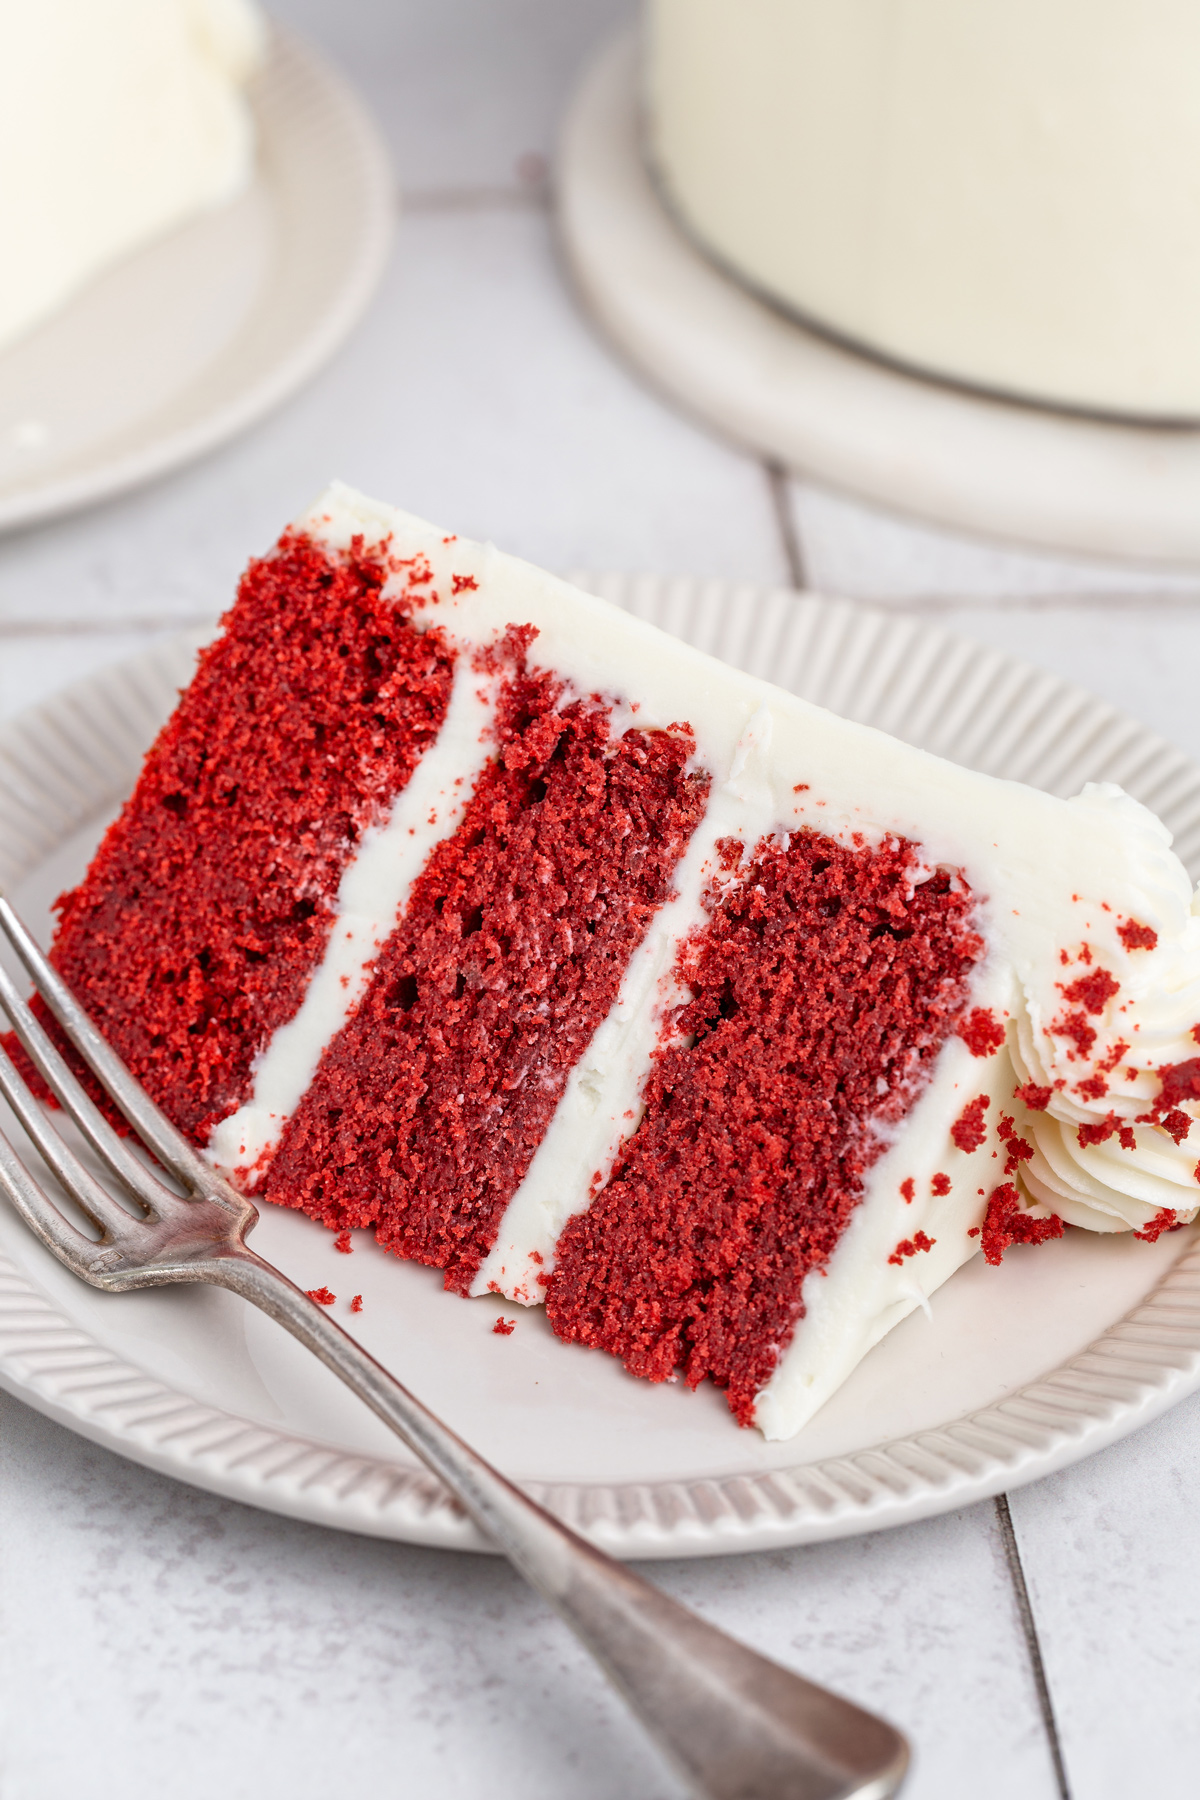
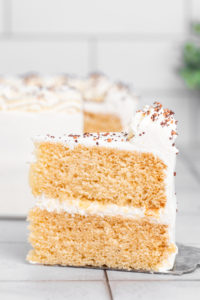
Red velvet cake with soft cocoa sponge layers and a light cream cheese frosting, made for a tender crumb and clean slices.
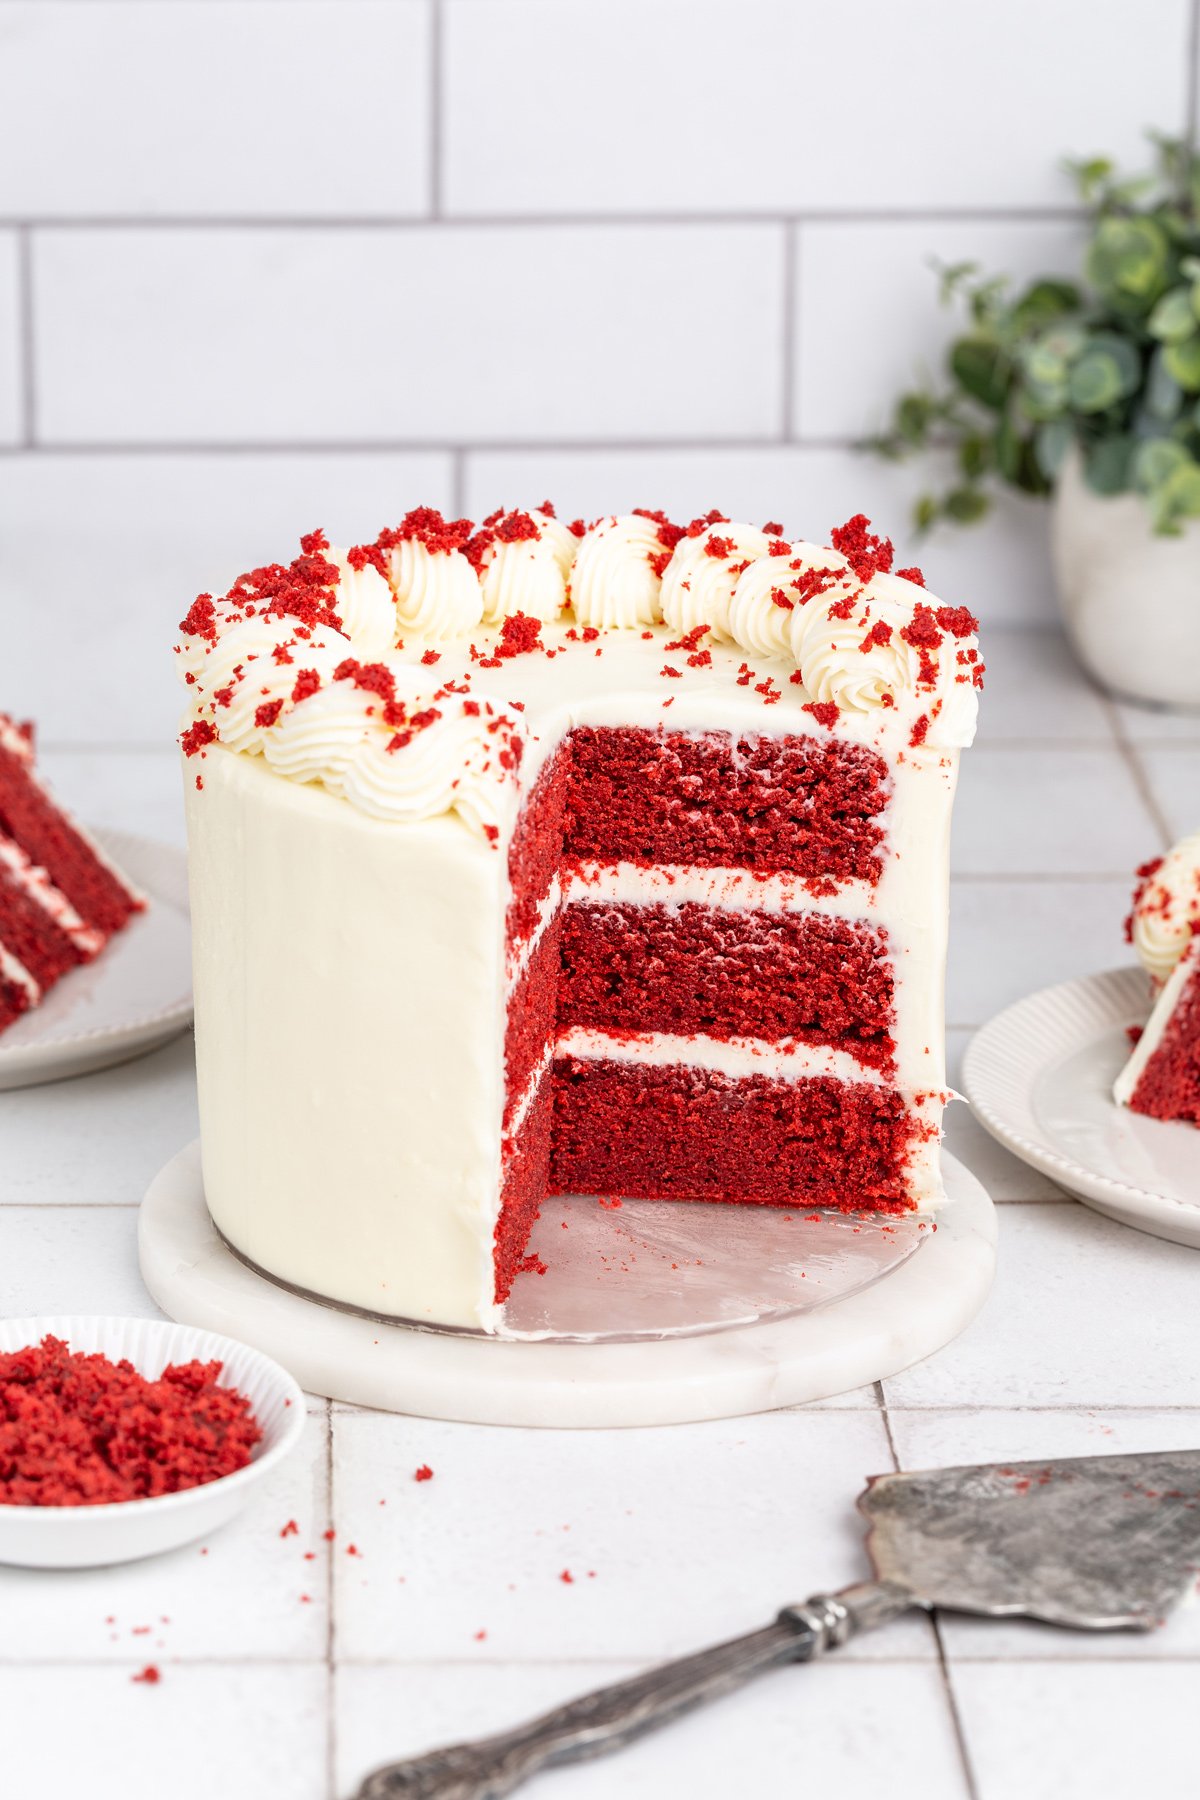
Red velvet cake made from scratch, with a soft crumb and a light cocoa flavor that doesn’t overpower the cake.
Finished with a cream cheese frosting that stays smooth, balanced, and easy to slice.
Why you’ll love this recipe
- It tastes right - You get the cocoa notes and the mild sweetness red velvet is known for.
- It slices well - The cake stays soft but holds together, even after chilling.
- It’s a from-scratch version - No box mix, just a recipe adjusted and baked at home.
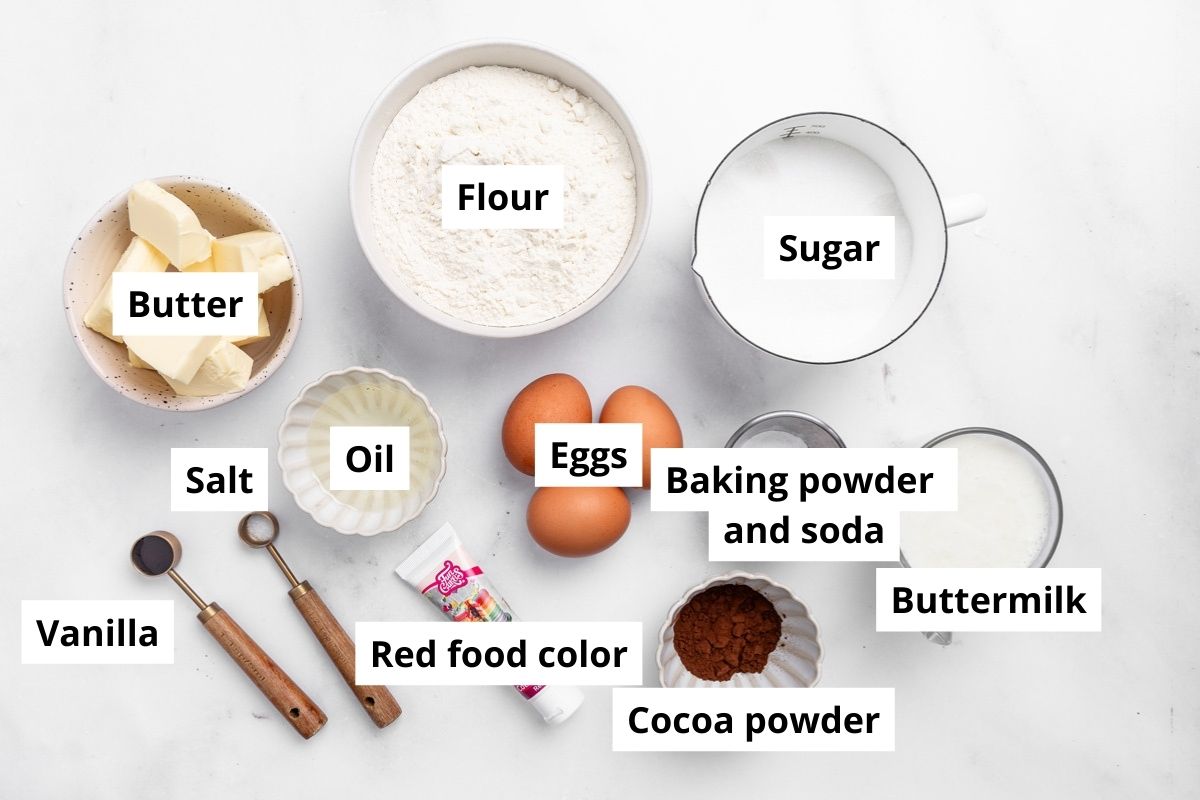
Ingredients you need
Here’s what you’ll need to make this red velvet cake at home.
- Butter – softened
- Sugar - granulated sugar and powdered sugar
- Oil - vegetable oil
- Eggs - room temperature
- White vinegar
- Cake flour
- Baking powder and baking soda
- Vanilla and salt
- Buttermilk
- Red gel food coloring
- Cocoa powder - unsweetened cocoa powder
- Cream cheese
Tips for success
- Use room temperature ingredients so the batter mixes evenly.
- Don’t overmix the batter once the dry ingredients are added, to keep the crumb soft.
- Measure the cocoa carefully; too much will overpower the red velvet flavor.
- Use gel food coloring for a deep red color without thinning the batter.
- Let the cake cool completely before frosting for clean layers and neat slices.
How to make red velvet cake
This red velvet cake is adapted from my vanilla cake recipe, adjusted to work well as a layered cake.
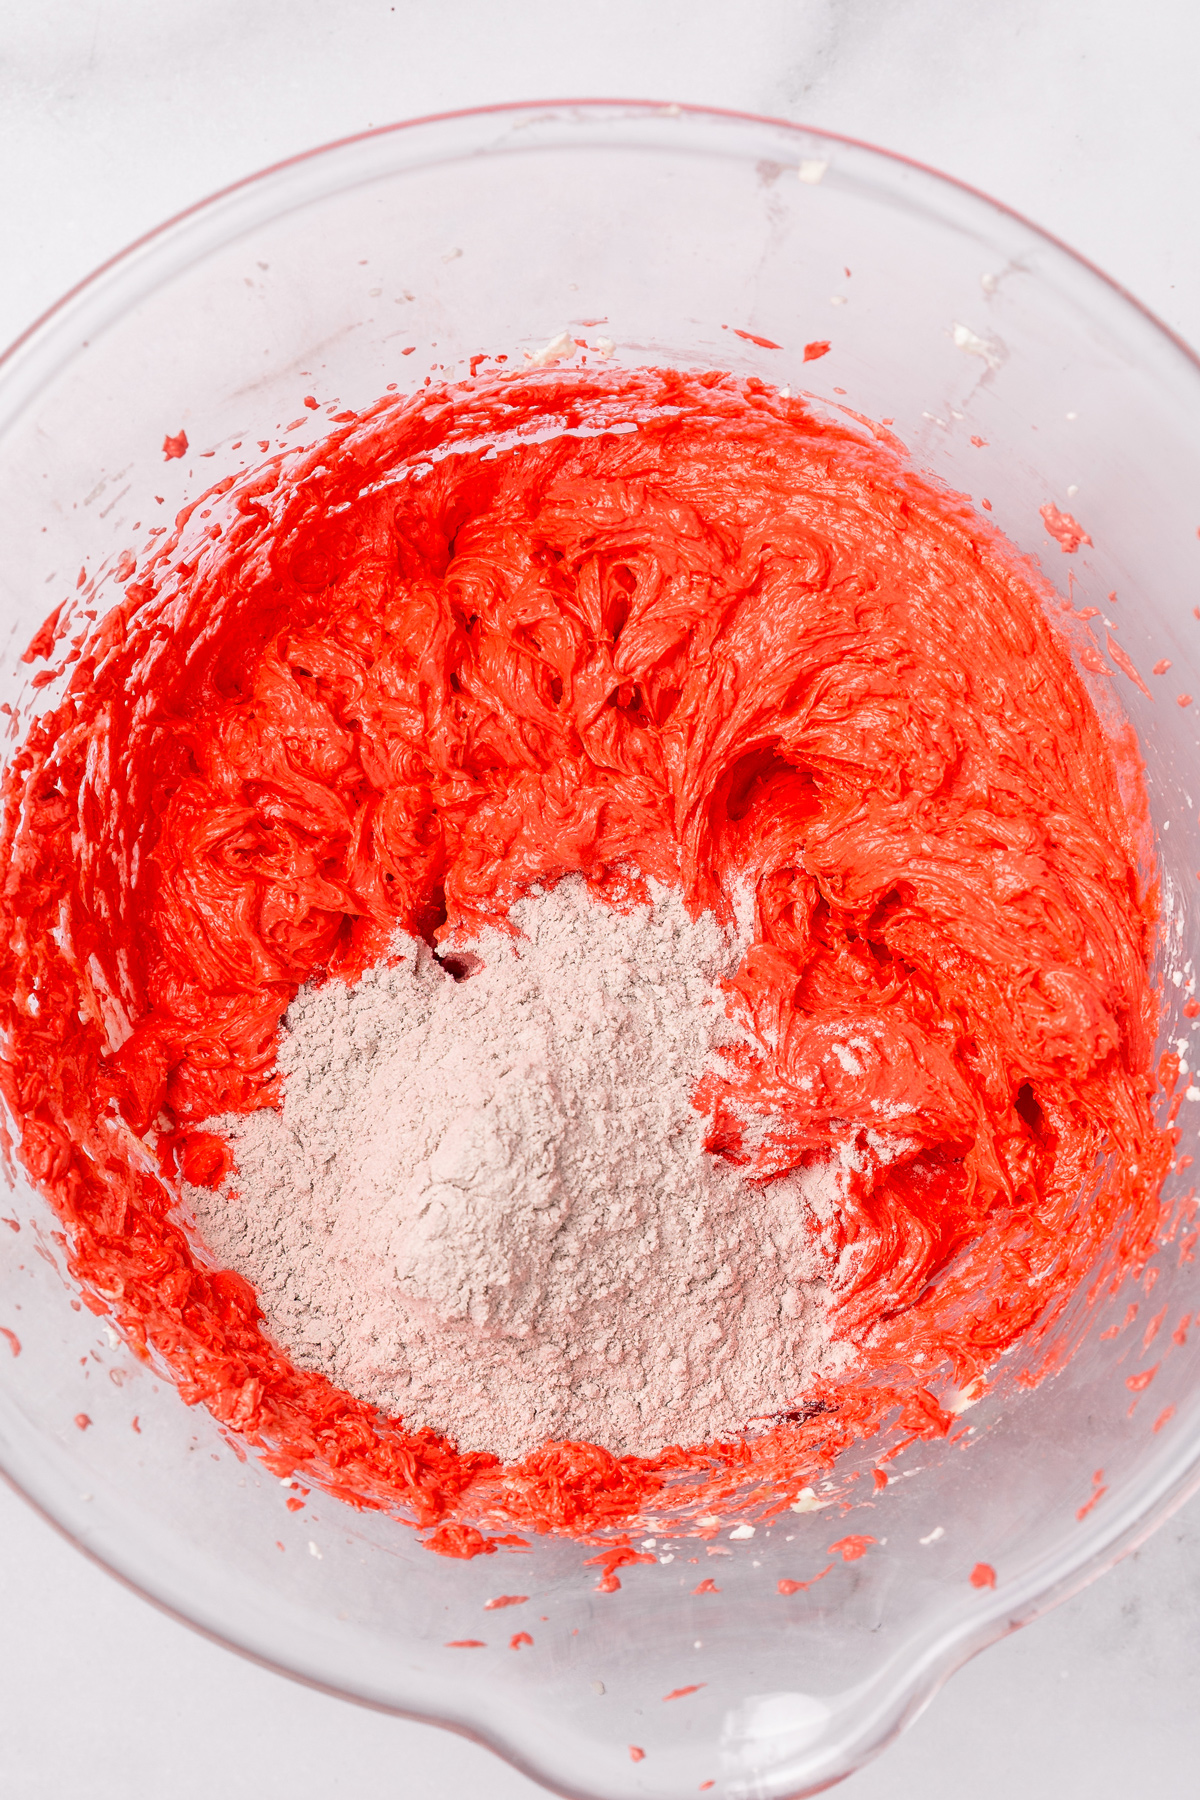
Cream the butter, oil, sugar, eggs, vanilla, and red food coloring until smooth and well combined.

Mix the dry ingredients in a bowl, then add them alternately with the buttermilk mixed with vinegar, starting and ending with the dry mixture.
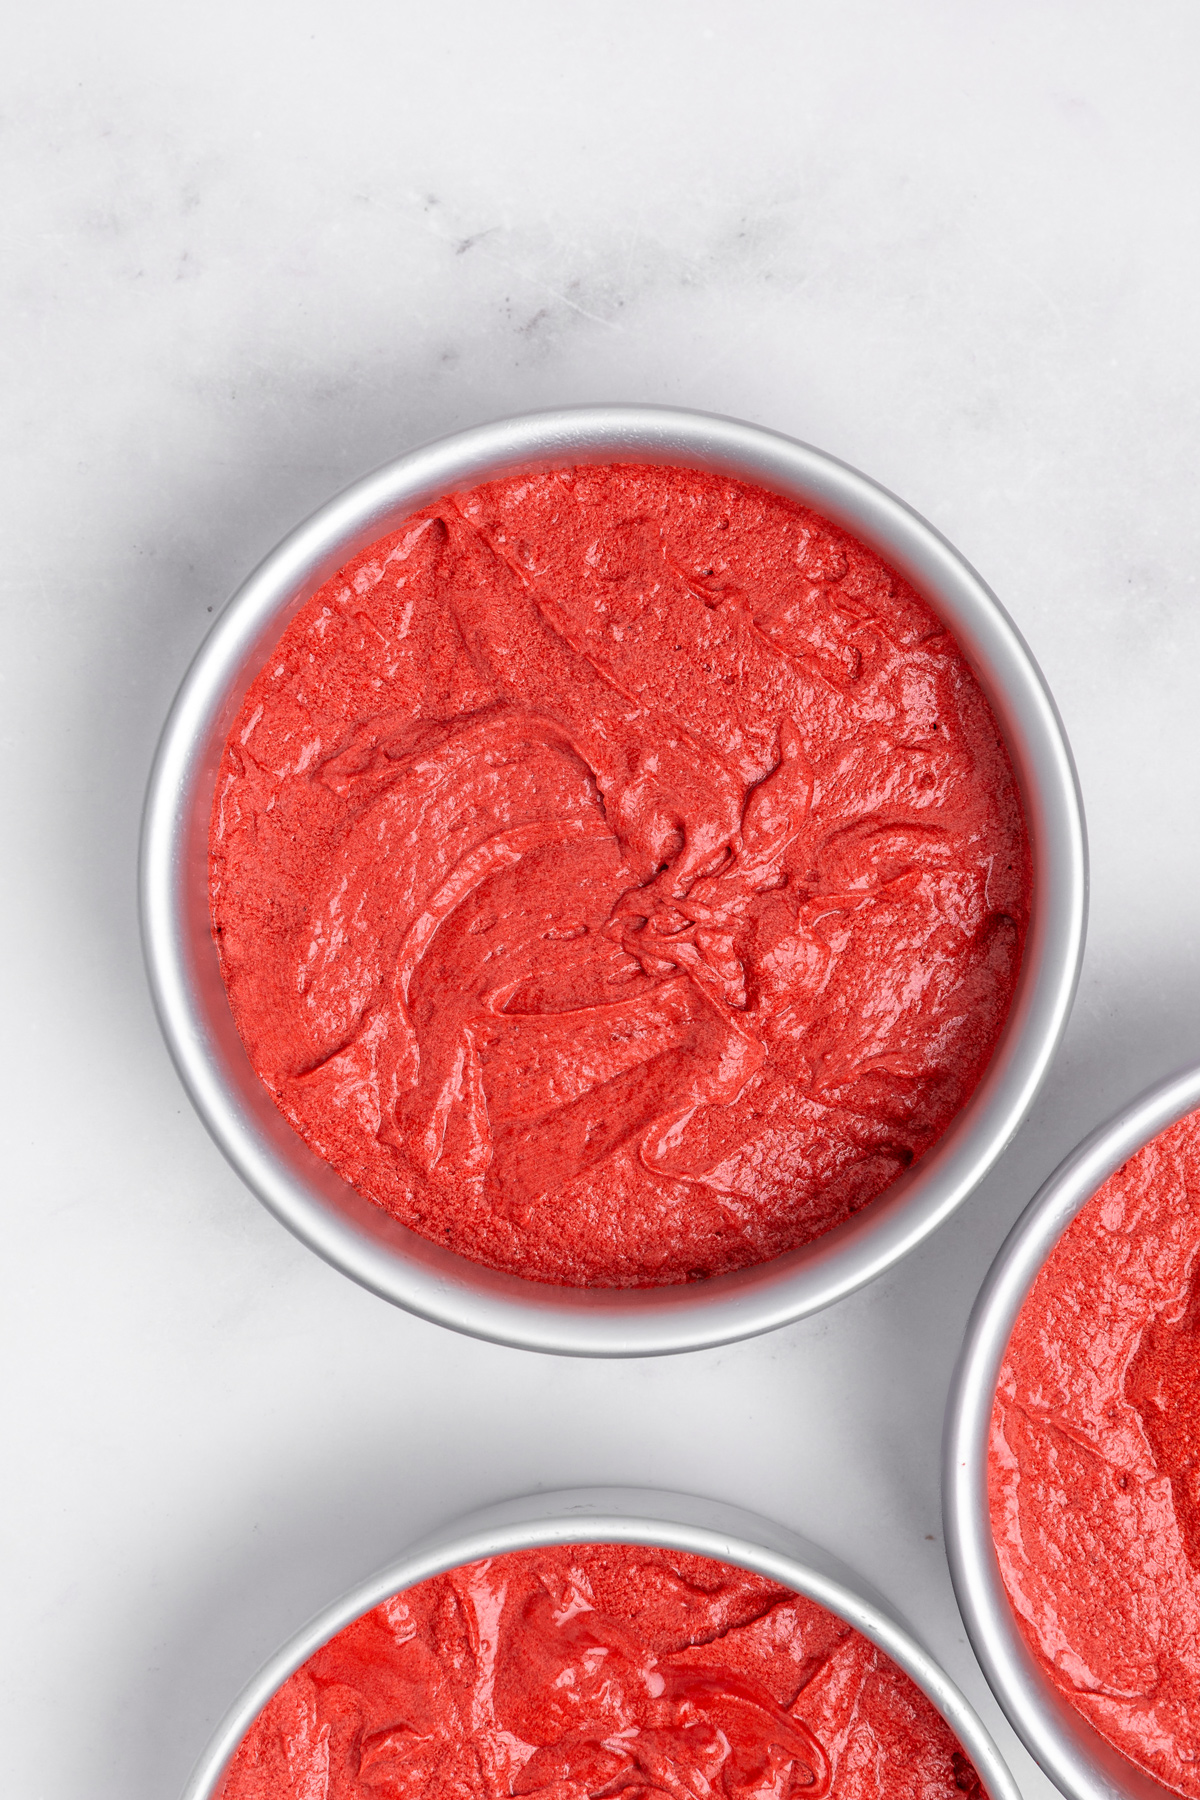
Pour the batter into the prepared pan and bake at 175°C (350°F) for about 40 minutes, until a toothpick comes out clean.
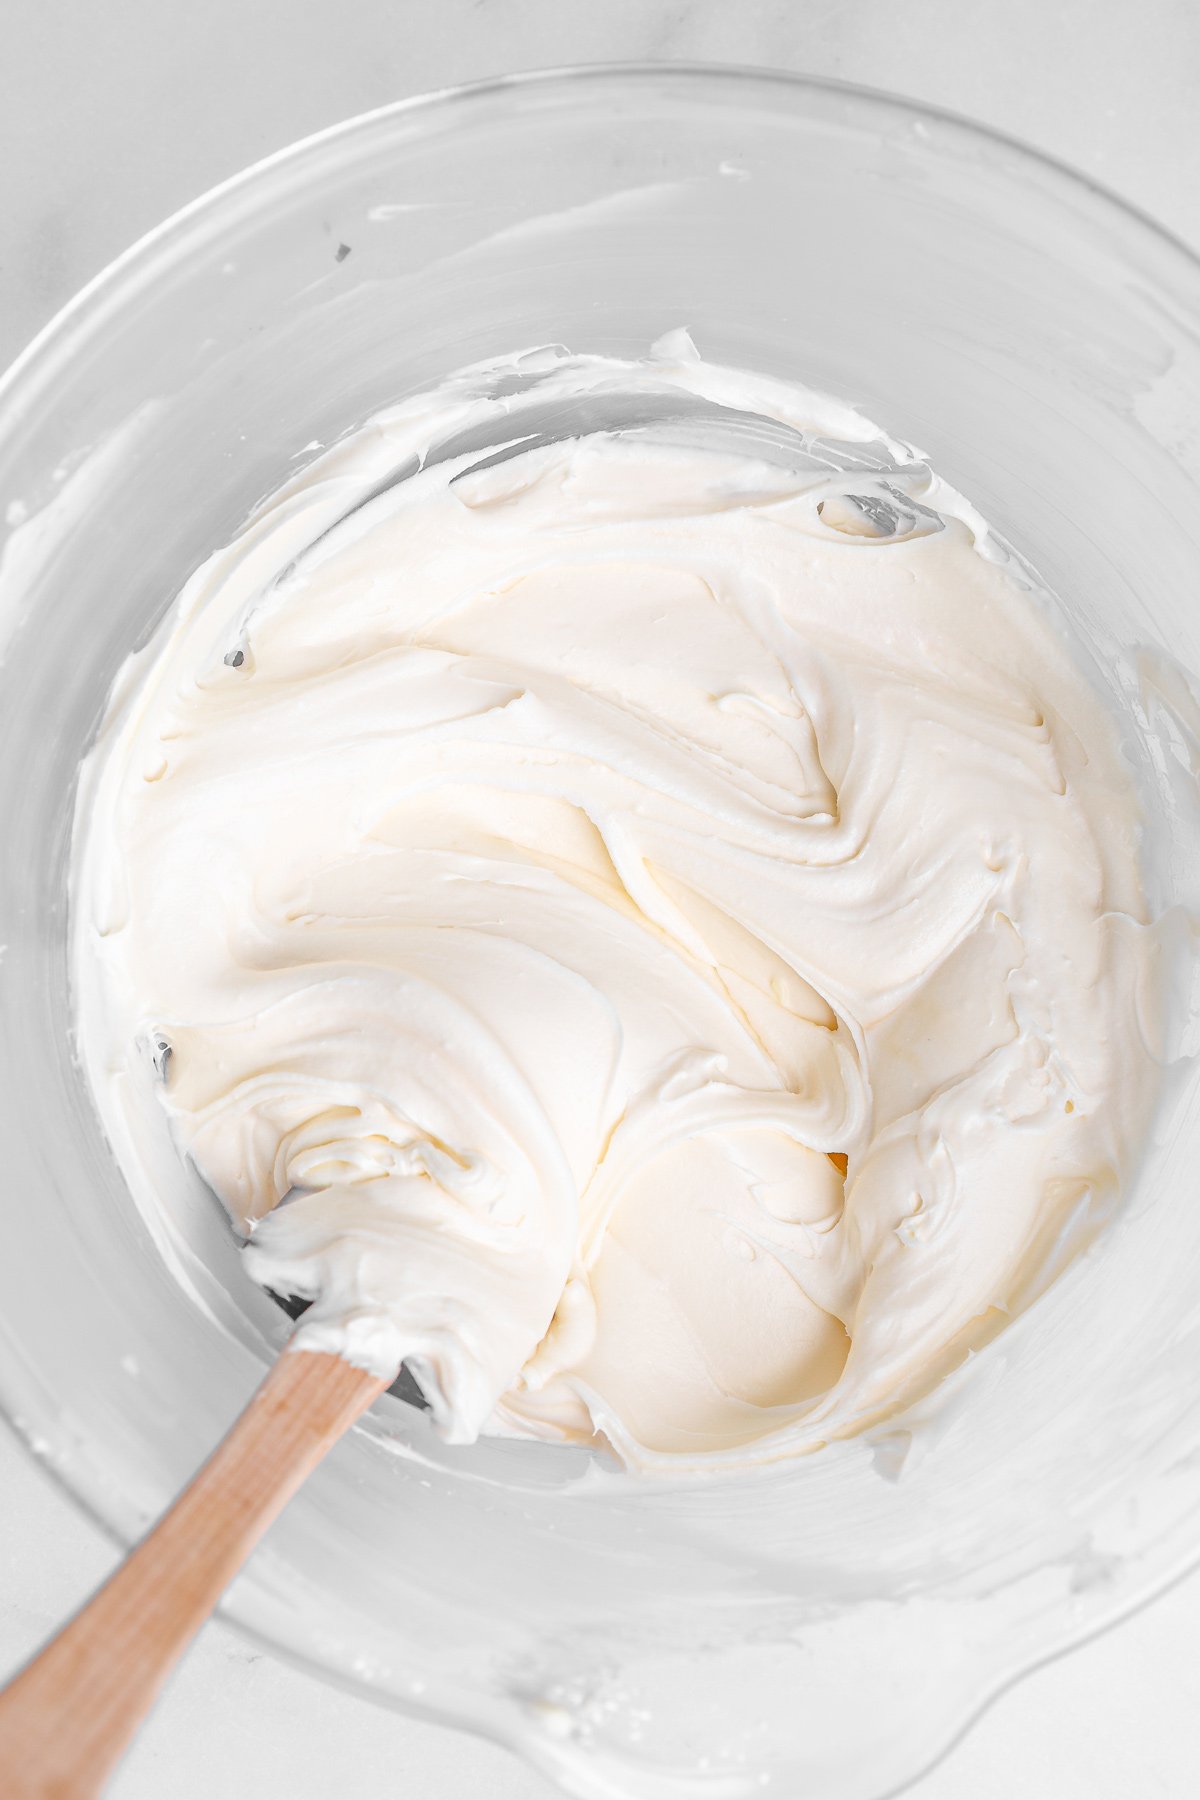
This cream cheese frosting isn’t too sweet and stays firm enough for a layer cake.
Beat the butter and powdered sugar, then add the cold cream cheese and vanilla and mix just until smooth.
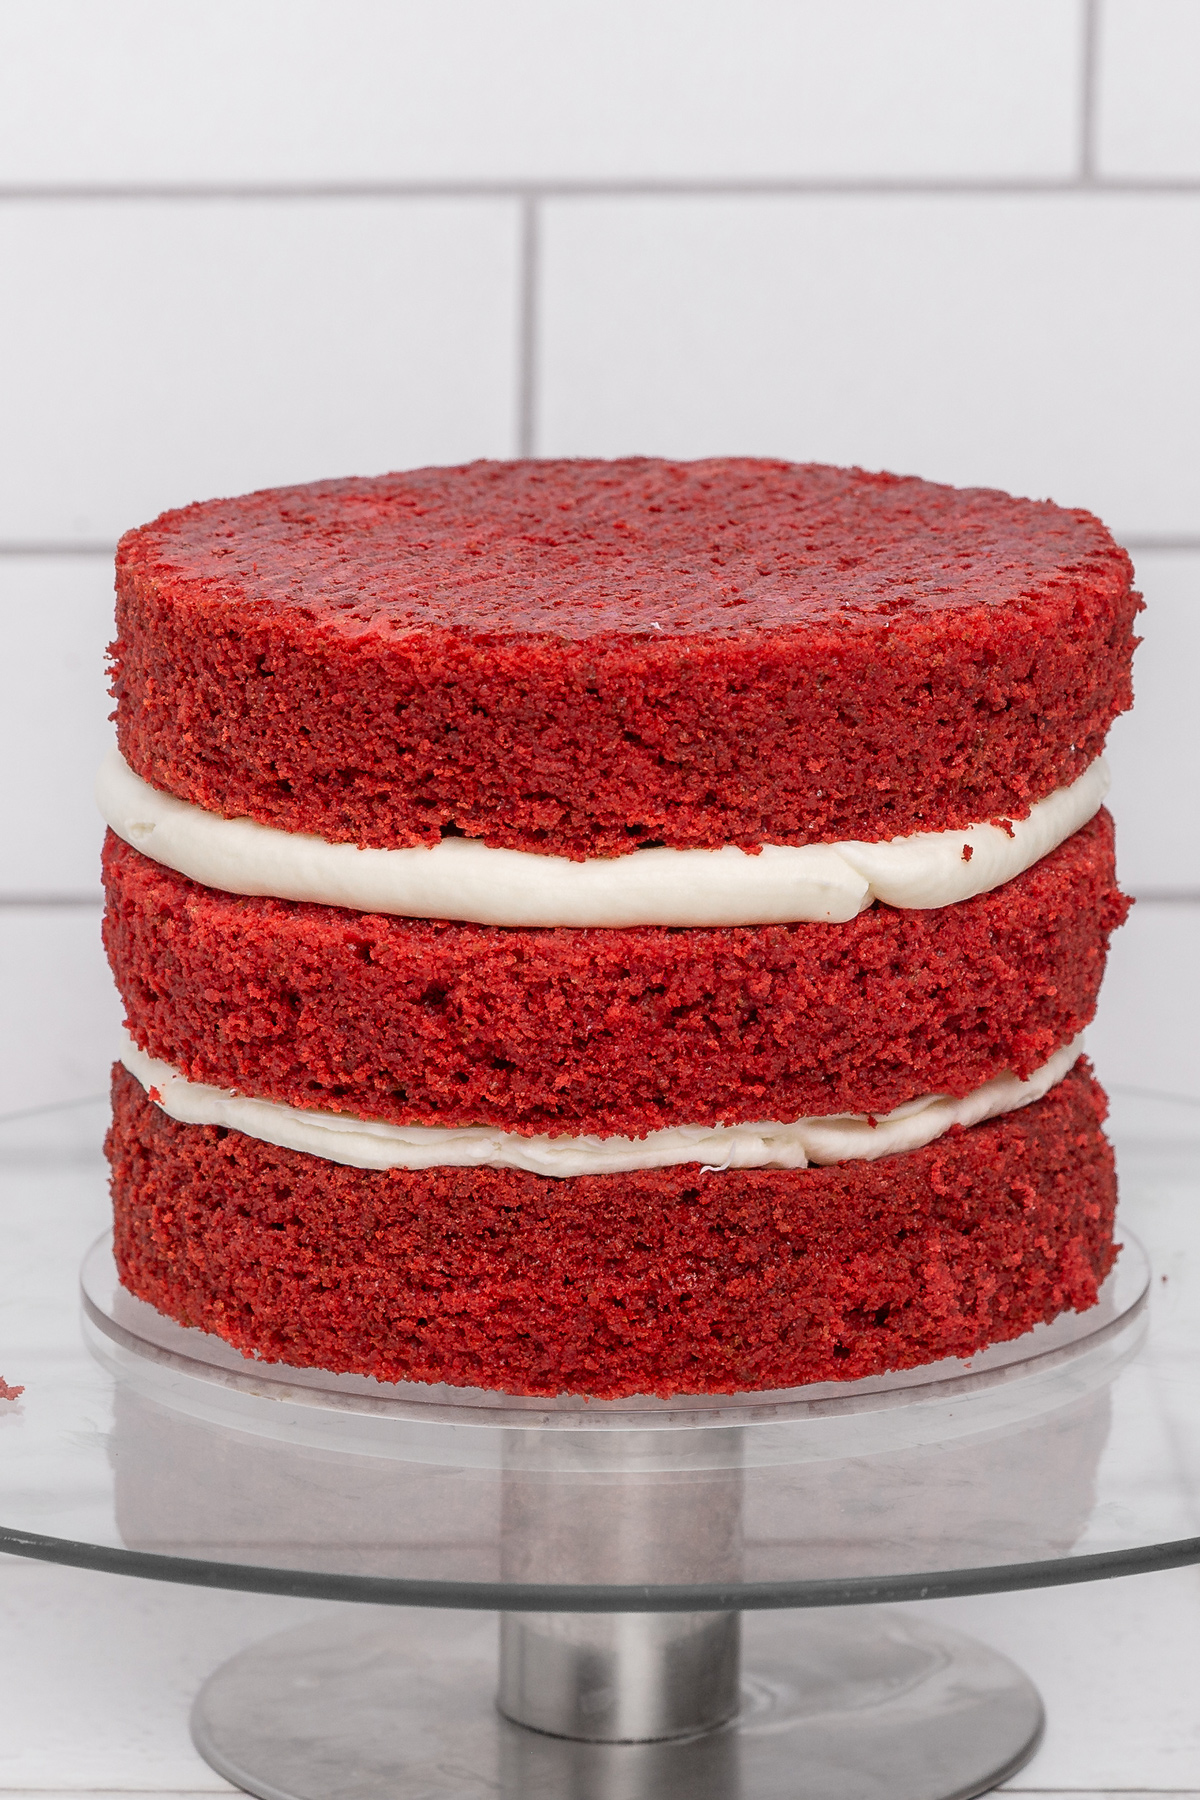
Trim the cake layers, fill the center with frosting, apply a thin crumb coat.
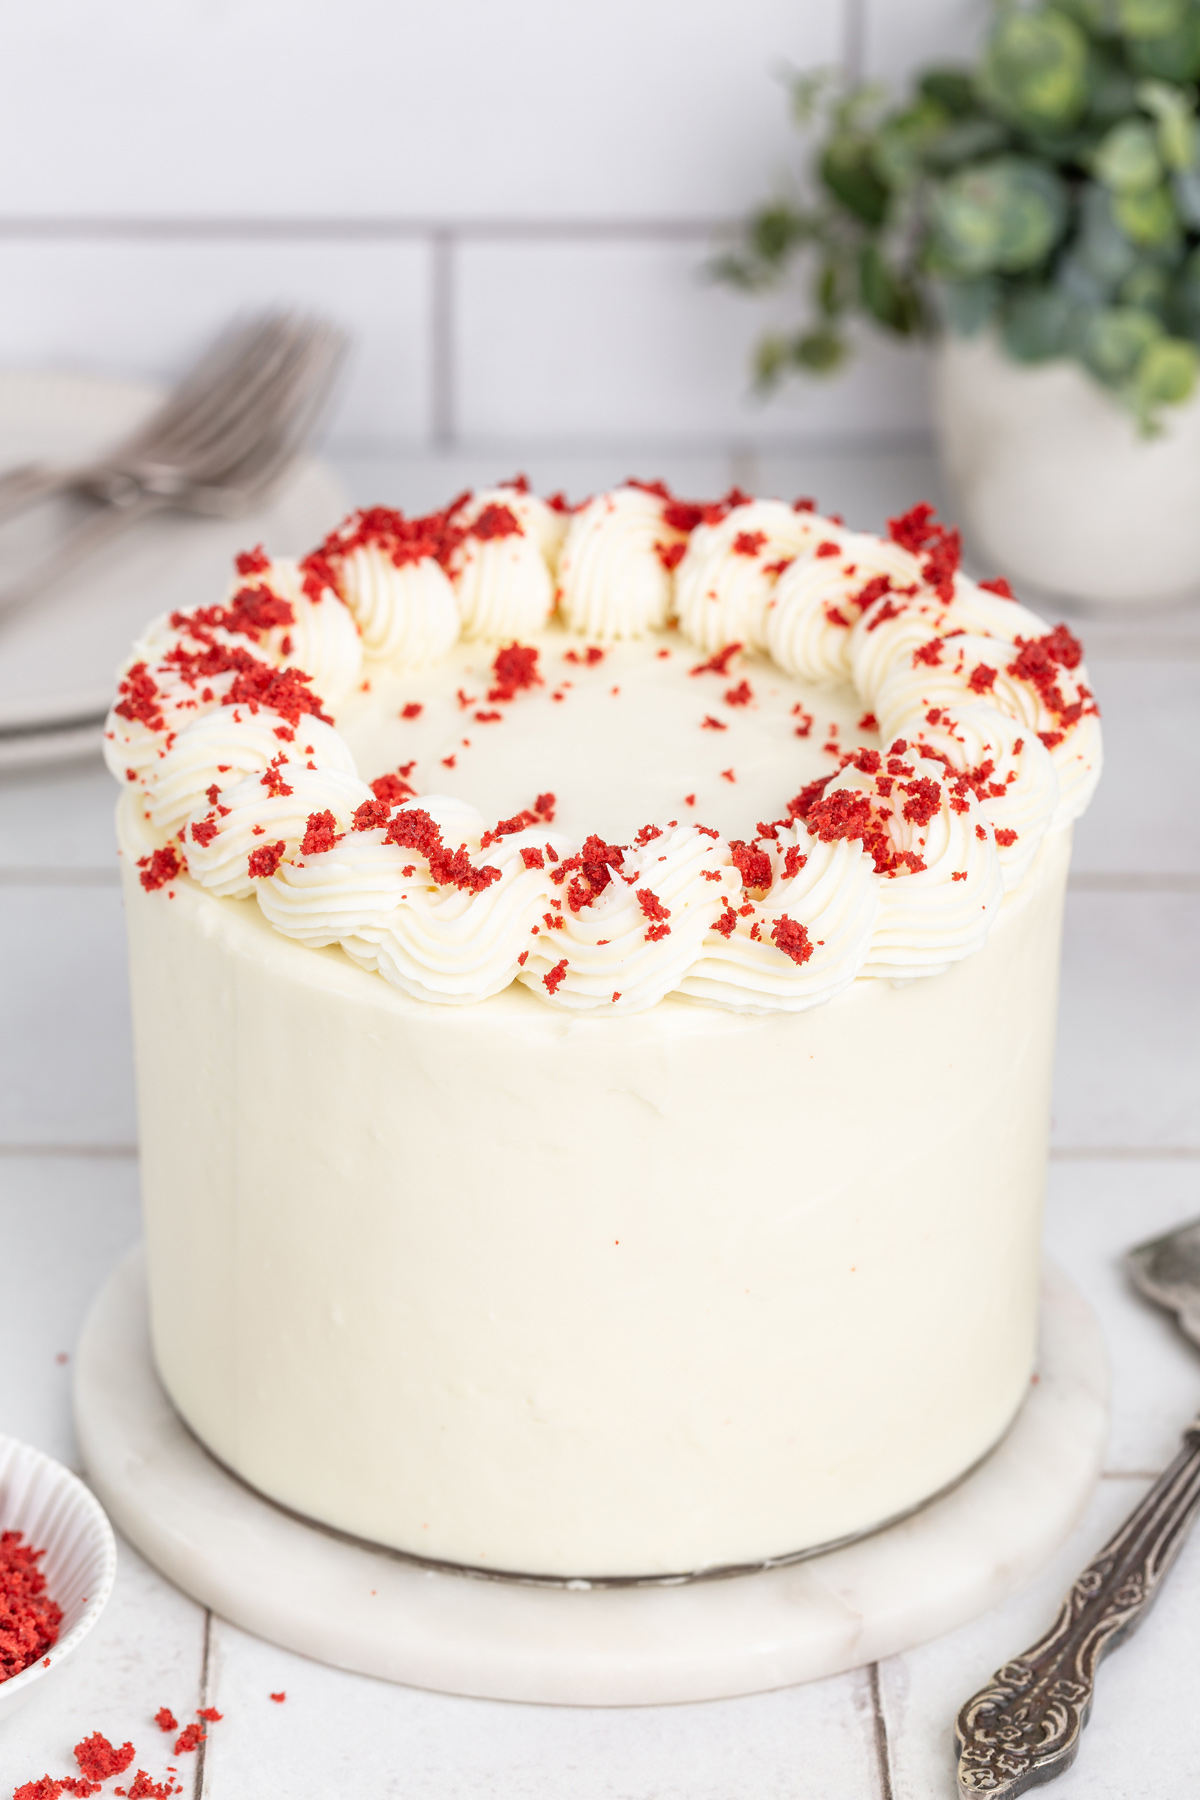
Then cover the whole cake and decorate with cake crumbs.
Serving suggestions
This red velvet cake is best served slightly chilled for clean slices.
It works well for birthdays, celebrations, or any time you want a classic cake that holds its shape.
Storage
Store the red velvet cake in the fridge, well covered, for up to 3 days.
Let it sit at room temperature for about 20 minutes before serving.
Variations
- Mini cakes – Bake the batter in smaller pans and reduce baking time.
- Chocolate cream cheese frosting – Add a little cocoa powder to the frosting.
- Less sweet version – Slightly reduce the sugar in the frosting.
- Natural red color – Use beet powder instead of gel coloring.
If you prefer individual portions, try my red velvet cupcakes made with the same base recipe.
Recipe Questions
Can I make red velvet cake ahead of time?
Yes, you can bake the cake layers a day ahead and store them wrapped in the fridge.
Do I have to use cake flour?
Cake flour gives a softer texture, but all-purpose flour can work in a pinch.
Why add vinegar to red velvet cake?
It helps activate the baking soda and brings out the classic red velvet flavor.
More Red Velvet Recipes
I hope you’ll love this recipe. If you try it, feel free to leave a comment. Happy baking!
Print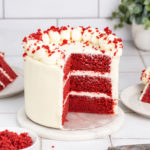
Red Velvet Cake
- Total Time: 1 hour 10 minutes
- Yield: 8 slices
Description
A from-scratch red velvet cake with a soft crumb, subtle cocoa flavor, and a balanced texture that works well for layering and clean slices.
Ingredients
Red velvet cake
- 40 g (3 Tbsp) neutral oil – sunflower or canola
- 150 g (⅔ cup) unsalted butter – softened
- 300 g (1½ cups) granulated sugar
- 3 large eggs – room temperature
- 1½ tsp vanilla extract
- 250 g (2 cups) cake flour
- 10 g (2 Tbsp) cocoa powder – unsweetened
- 1½ tsp baking powder
- ½ tsp baking soda
- ¼ tsp salt
- 220 ml (about 1 cup minus 2 Tbsp) buttermilk
- 1 tsp white vinegar
- Red gel food coloring – as needed
Cream cheese frosting
- 400 g (1¾ cups) cream cheese – full-fat, cold
- 280 g (1¼ cups) unsalted butter – softened
- 600 g (5 cups) powdered sugar – sifted
- 2 tsp vanilla extract
Instructions
Prepare the cake batter
- Preheat the oven to 175°C (350°F) and grease and line three 15 cm (6-inch) cake pans.
- In a large bowl, cream the butter, oil, and sugar until smooth.
- Add the eggs one at a time, mixing well after each addition, then add the vanilla and red gel food coloring.
- In a separate bowl, mix the cake flour, cocoa powder, baking powder, baking soda, and salt.
- Mix the buttermilk with the vinegar.
- Add the dry ingredients and the buttermilk alternately to the batter, starting and ending with the dry ingredients, mixing just until combined.
- Divide the batter evenly between the three pans and smooth the tops.
- Bake for 22–25 minutes, until a toothpick inserted in the center comes out clean.
- Let the cakes cool completely before unmolding.
Prepare the cream cheese frosting
- Beat the butter and powdered sugar until smooth and creamy.
- Add the cold cream cheese and vanilla, then mix just until smooth.
- Stop mixing as soon as the frosting is combined.
Assemble the cake
- Level the cake layers if needed.
- Spread frosting between each layer.
- Apply a thin crumb coat over the whole cake and refrigerate for 20 minutes.
- Cover the cake with the remaining frosting and decorate with cake crumbs if desired.


Notes
Storage: Store the cake covered in the fridge for up to 3 days, then let it sit at room temperature for 20 minutes before serving.
Tips:
- Use room-temperature ingredients for a smooth batter.
- Weigh the batter evenly between the pans for even layers.
- Do not overmix once the flour is added.
- Let the cakes cool completely before assembling.
- Chill the cake briefly after the crumb coat for cleaner frosting.
- Prep Time: 30 minutes
- Cook Time: 40 minutes
- Category: cake,
- Cuisine: American
Leave a Reply