
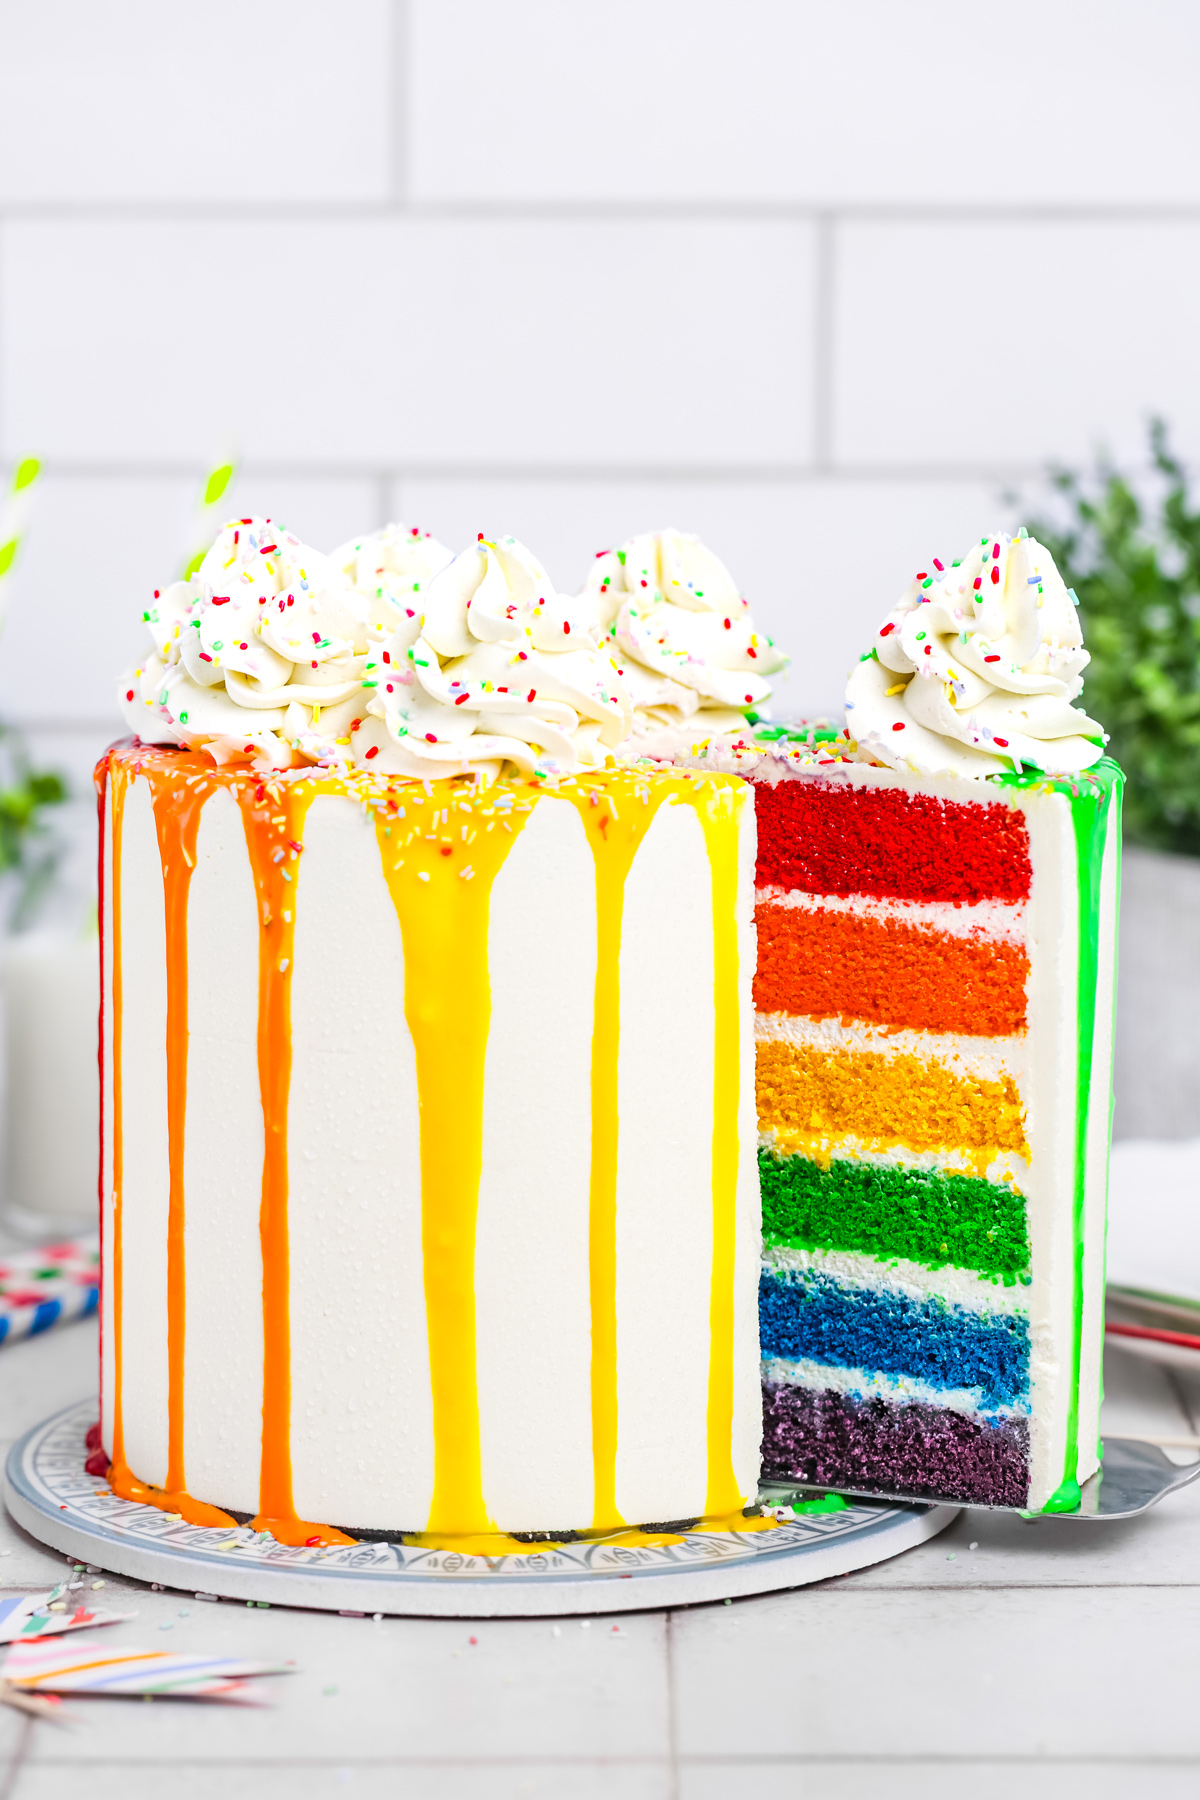
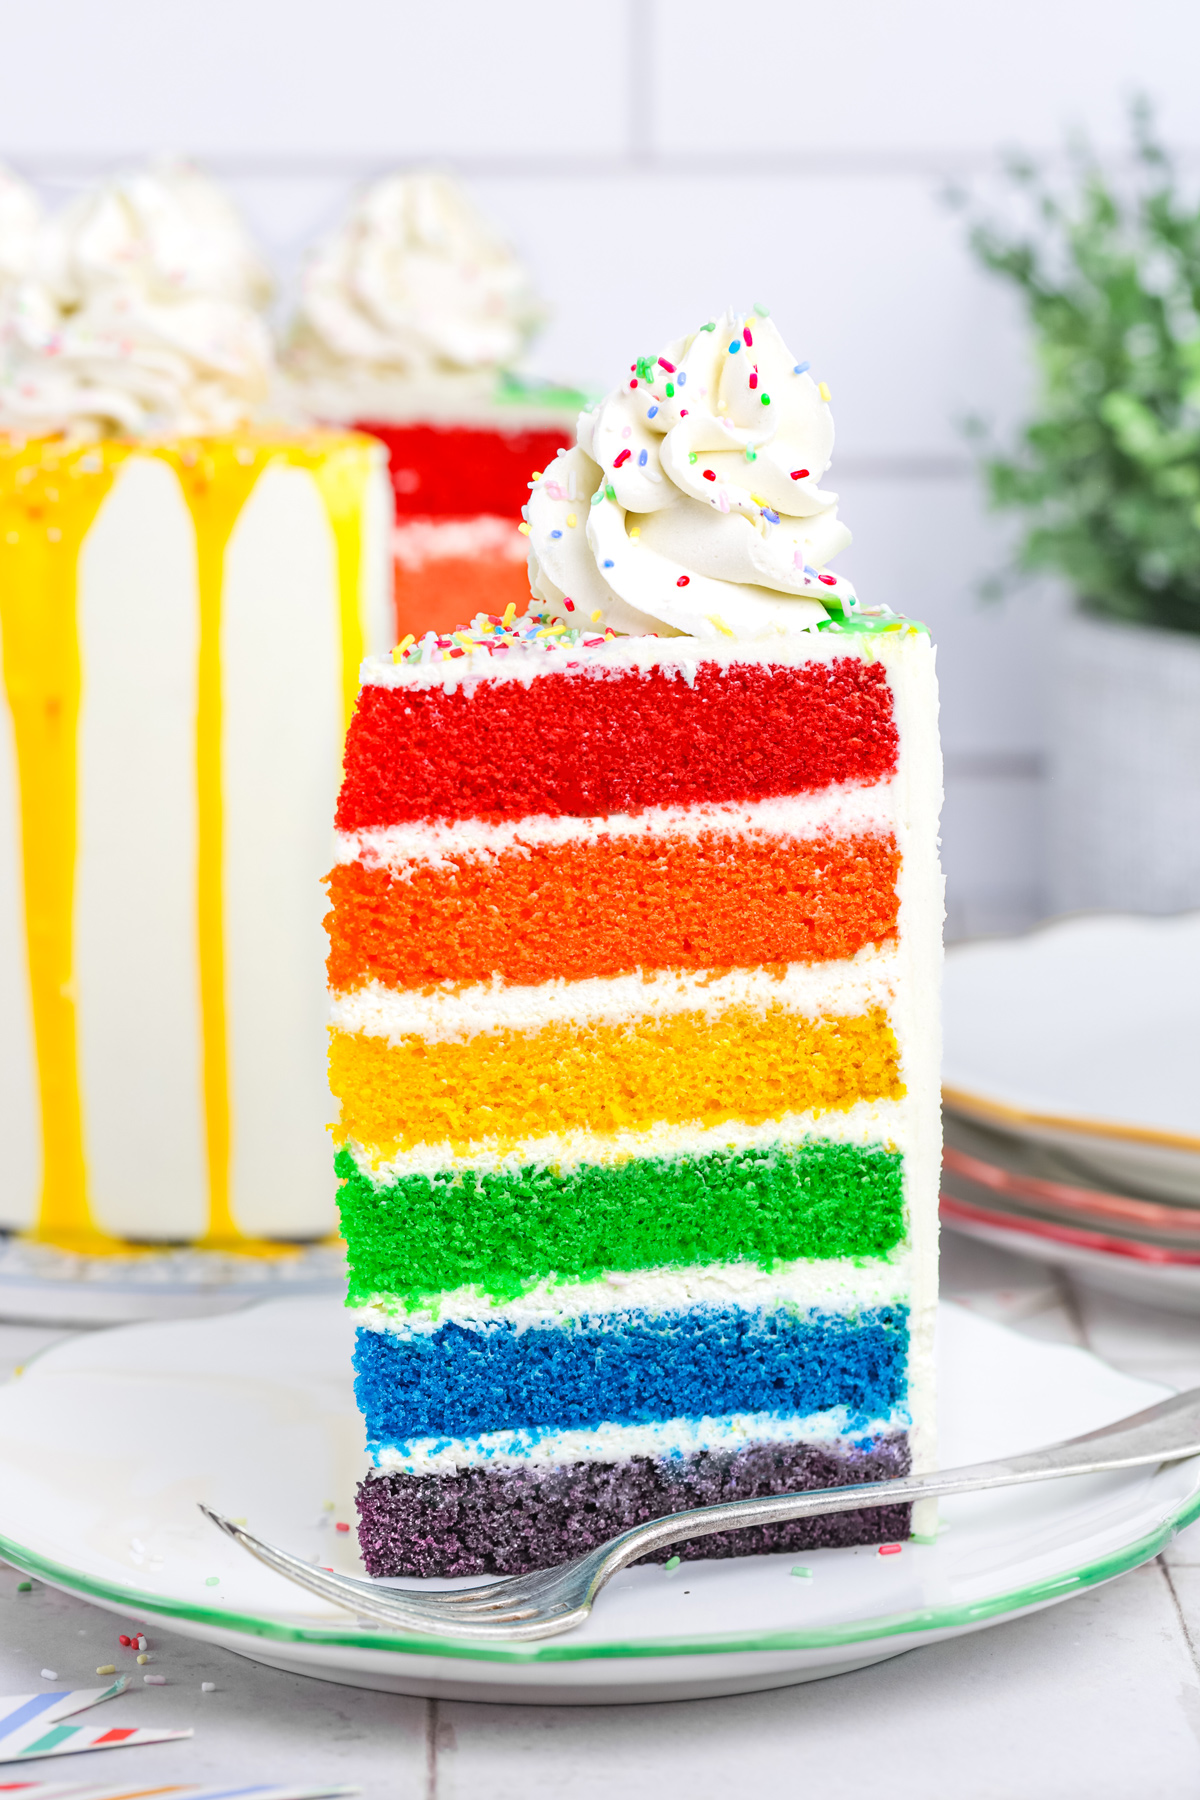
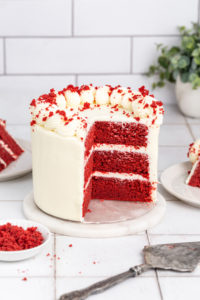
Rainbow cake made with six colorful vanilla cake layers, creamy filling, and smooth buttercream frosting for a bright and festive layer cake.
This rainbow cake recipe is a colorful vanilla layer cake made with soft sponge layers and creamy frosting, perfect for birthdays and celebrations.
I often bake this rainbow birthday cake for parties because the bright layers create a beautiful slice while the vanilla cake stays soft and easy to assemble.
Why you'll love this recipe
- Bright rainbow layers – Six colorful vanilla cake layers create a fun rainbow layer cake that looks beautiful when sliced.
- Soft vanilla sponge – A light and fluffy vanilla cake that stays moist and stable for stacking.
- Perfect celebration cake – A rainbow birthday cake that’s ideal for parties, kids birthdays, and festive dessert tables.
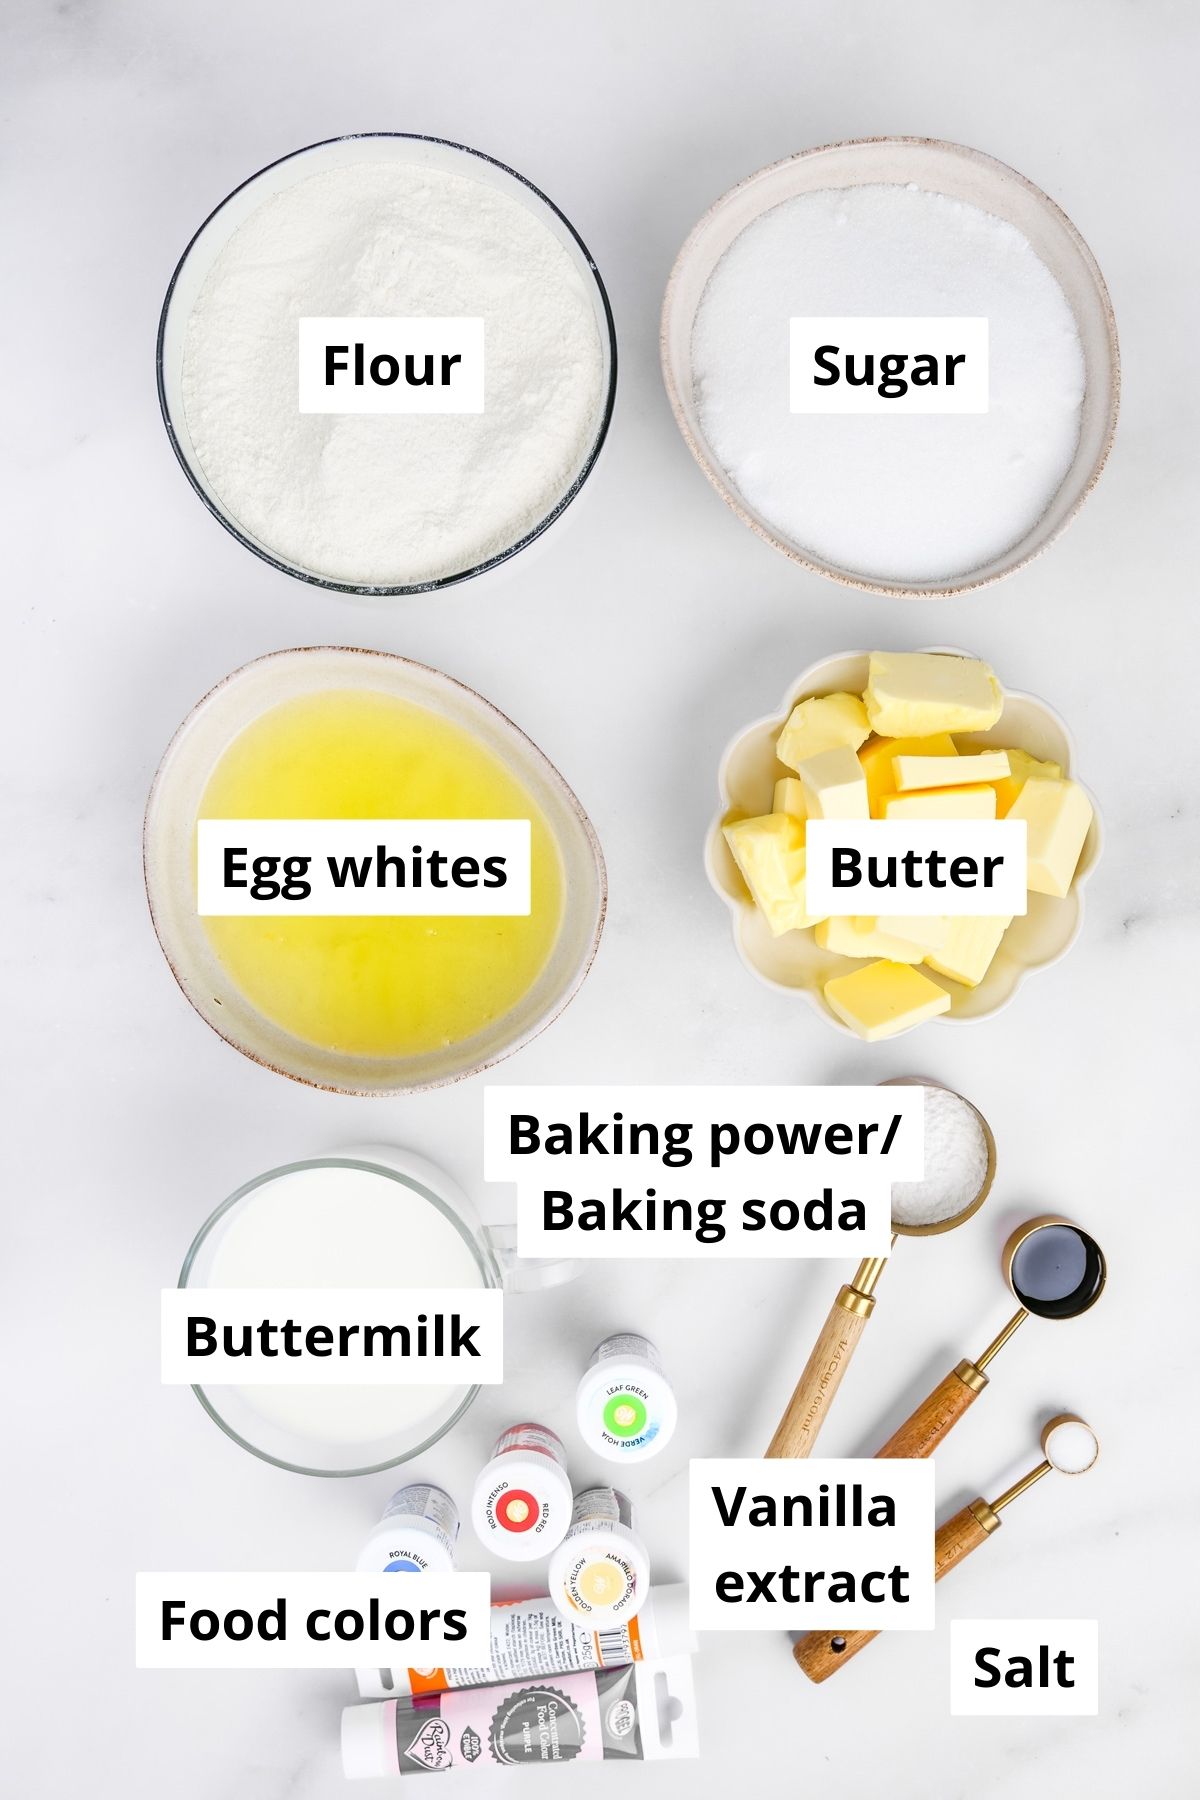
Ingredients You Need
This rainbow cake recipe uses a soft vanilla cake batter divided into colorful layers, filled with creamy mascarpone whipped cream and finished with smooth buttercream frosting.
- Cake flour: sifted
- Baking powder and baking soda
- Unsalted butter: softened
- Granulated sugar and powdered sugar
- Egg whites: room temperature
- Vanilla extract and salt
- Buttermilk
- Gel food coloring
- Mascarpone cheese
- Heavy cream: full-fat and cold
- White chocolate: melted with cream for the colorful drip decoration
Tips for this recipe
- Use gel food coloring: it gives bright rainbow layers without thinning the batter.
- Weigh the batter: divide it evenly between bowls for uniform cake layers.
- Bake layers separately: thin layers bake faster and stay soft.
- Chill before frosting: cold cake layers are easier to stack and frost cleanly.
- Use a cake scraper: it helps create smooth sides on your rainbow layer cake.
How to Make Rainbow Cake
You can see that this rainbow cake is made from my classic vanilla cake recipe, simply divided and colored to create the bright rainbow layers.
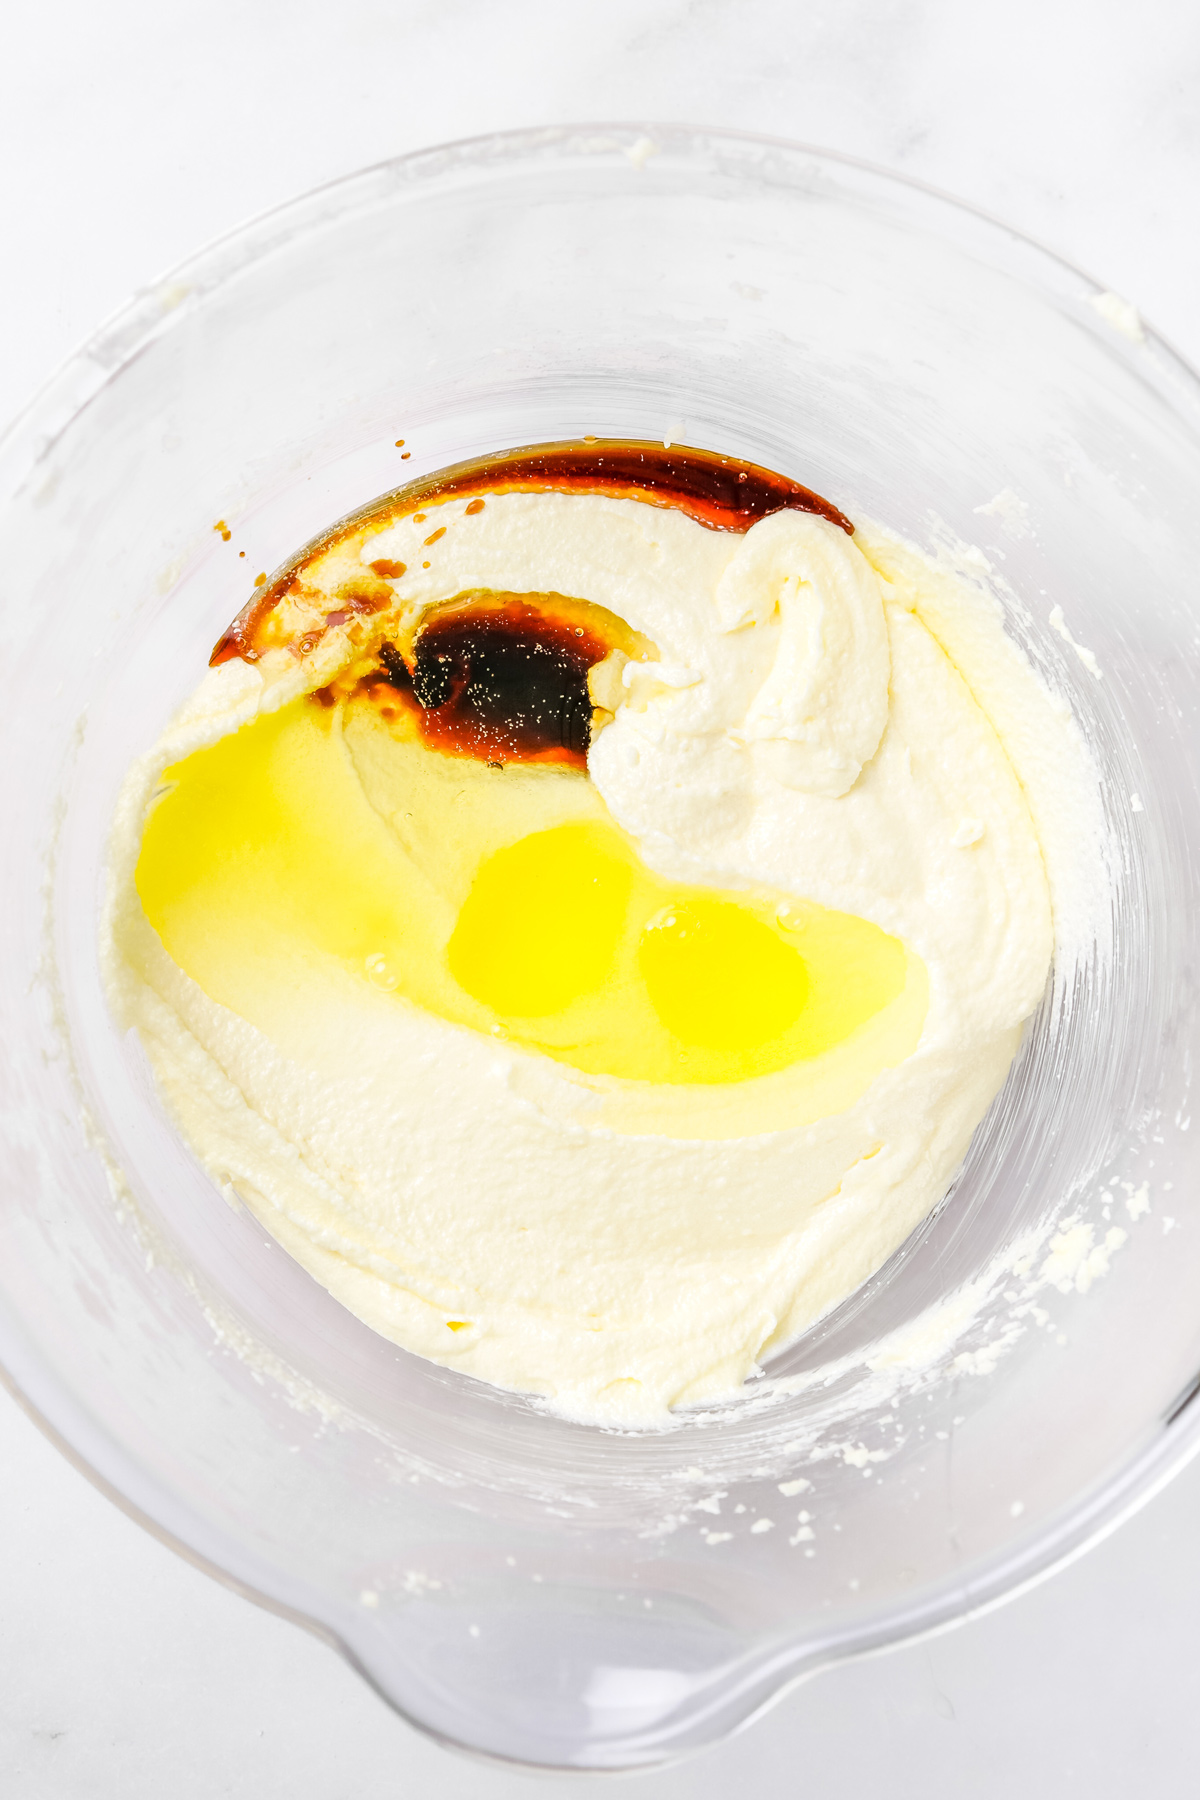
Cream butter and sugar in a large bowl until light and fluffy.
Add the egg whites and vanilla gradually, mixing well to keep the batter smooth and airy.
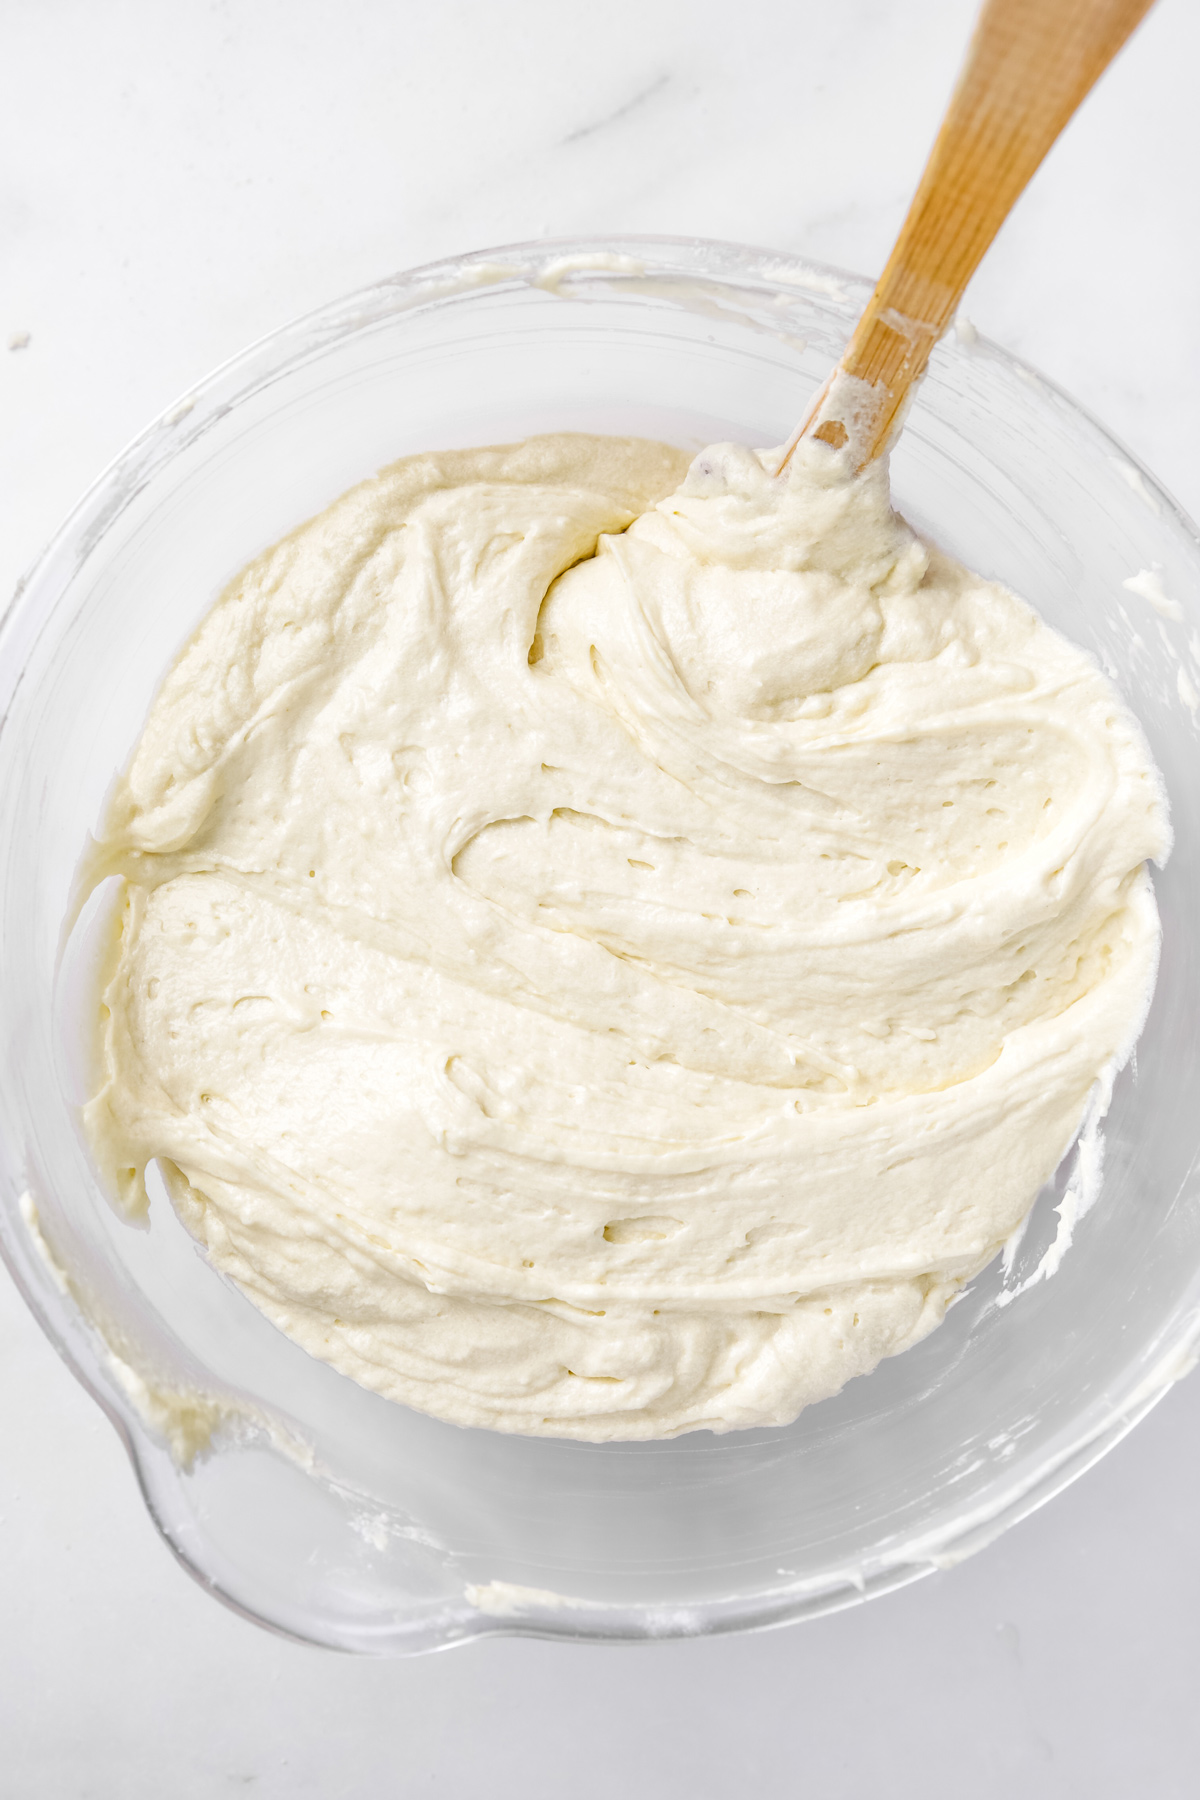
Fold in the sifted flour and buttermilk alternately until the vanilla cake batter is smooth.
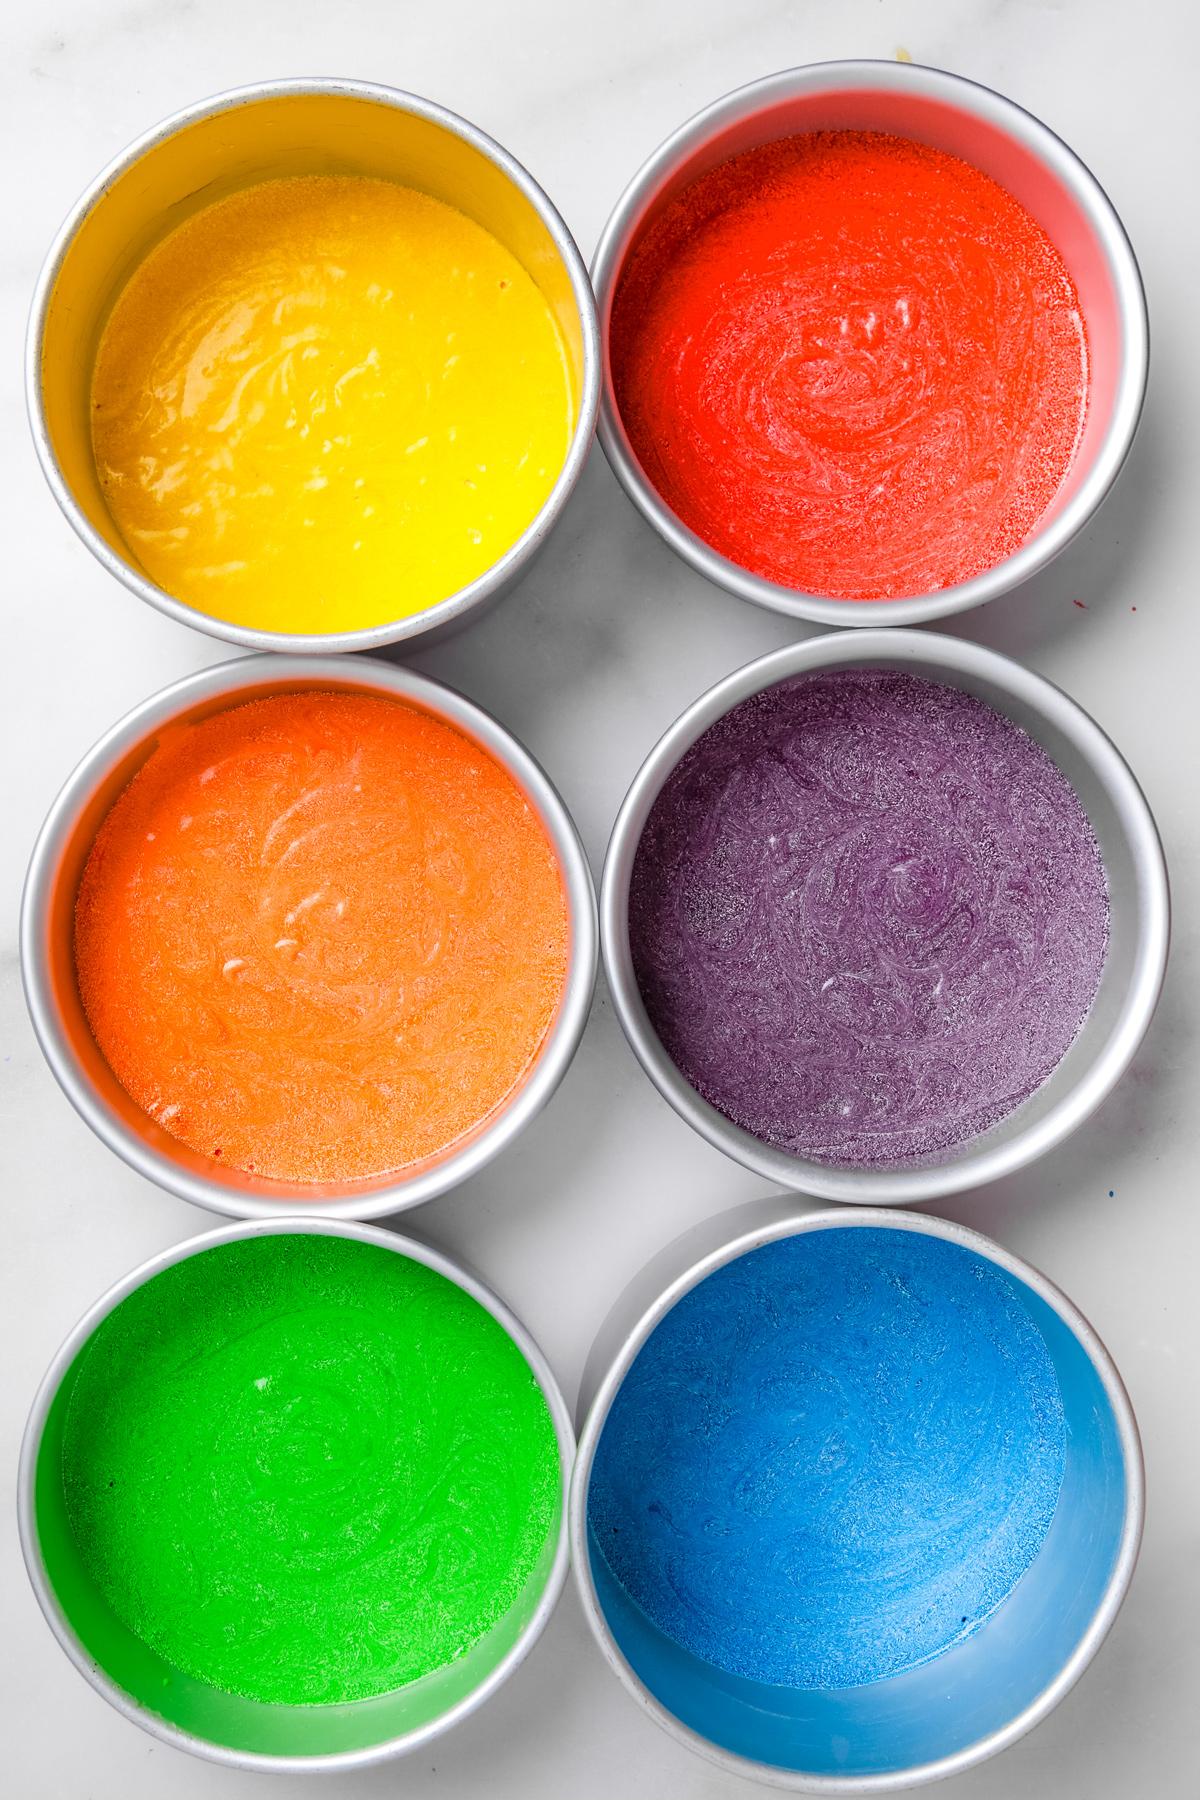
Divide the batter evenly into six bowls using a kitchen scale.
Color each portion with gel food coloring to create the rainbow cake layers.
Pour the colored batter into six lined 6-inch cake pans.
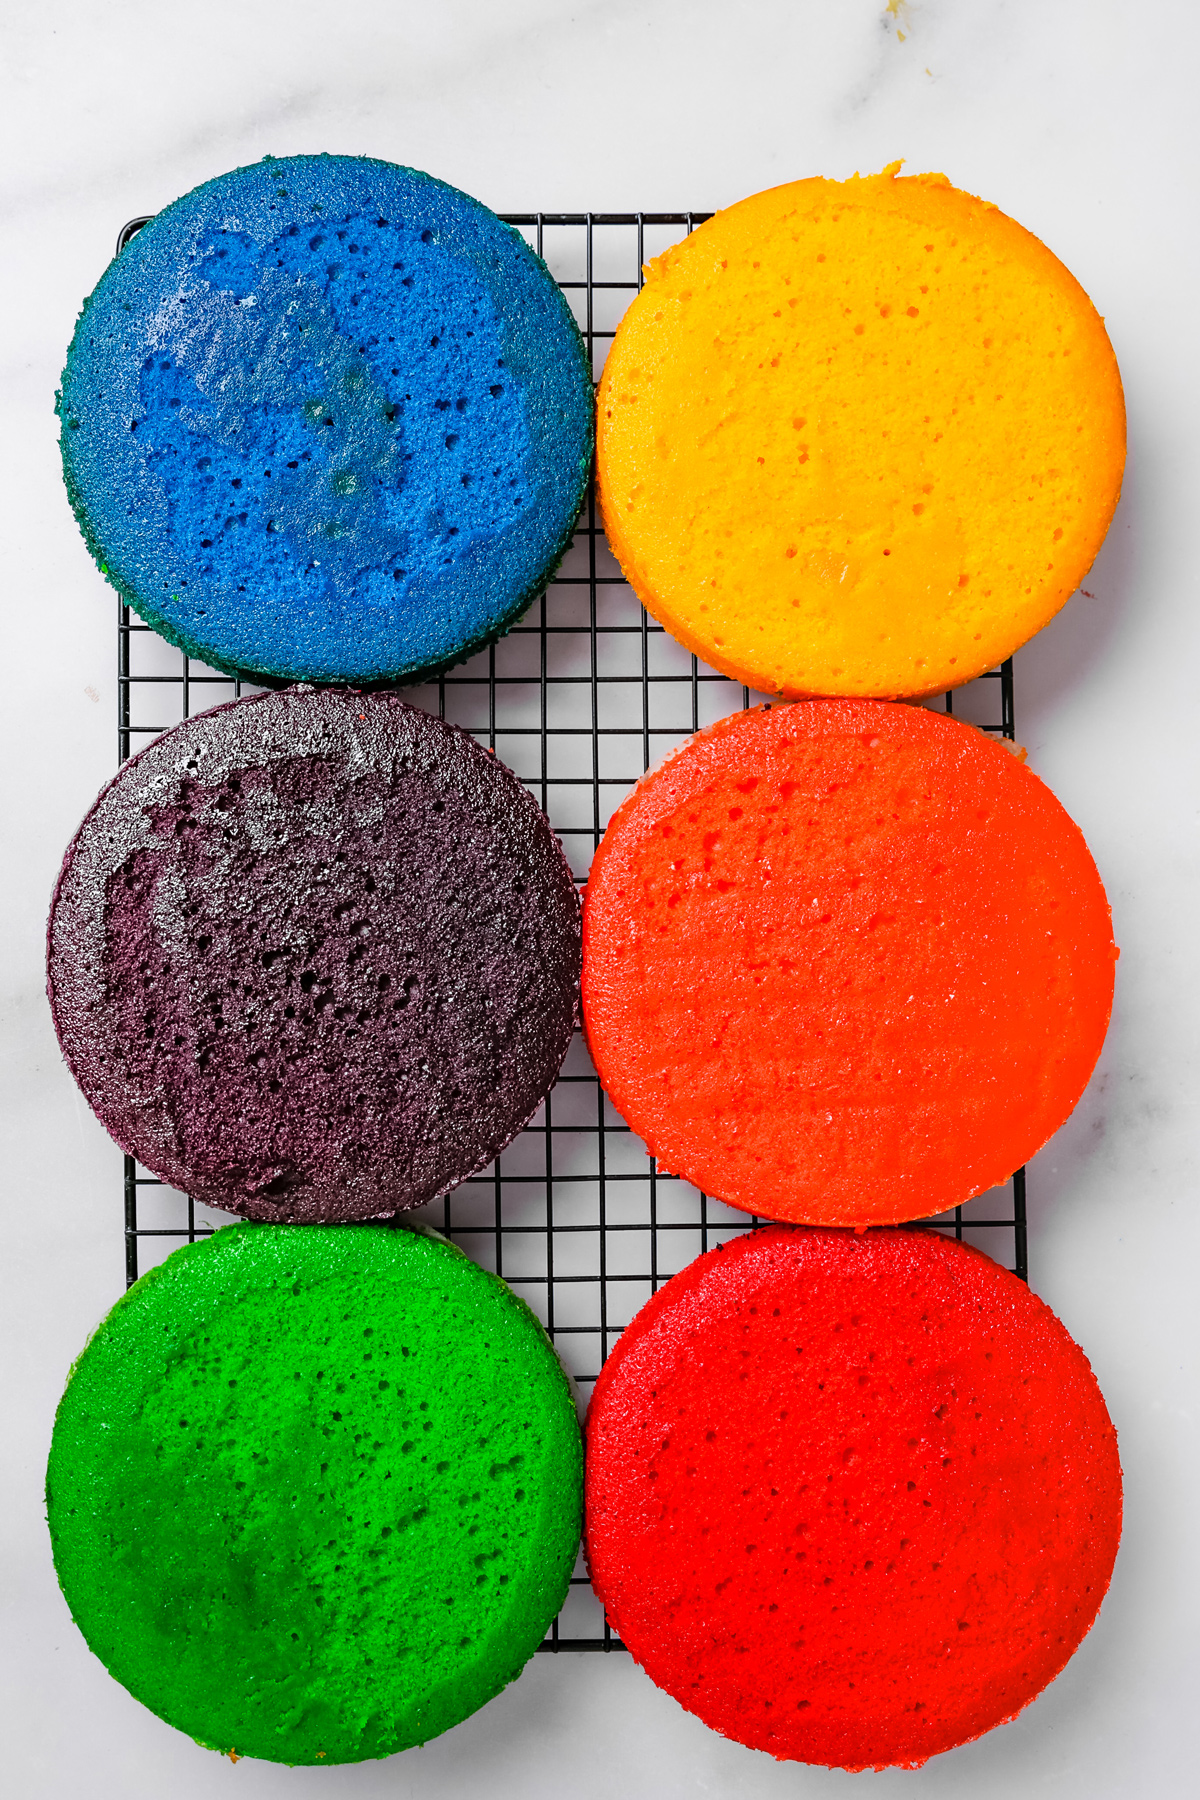
Bake at 325°F (160°C) for 18–20 minutes until the rainbow cake layers are set in the center.
Cool the cake layers completely on a rack before assembling.
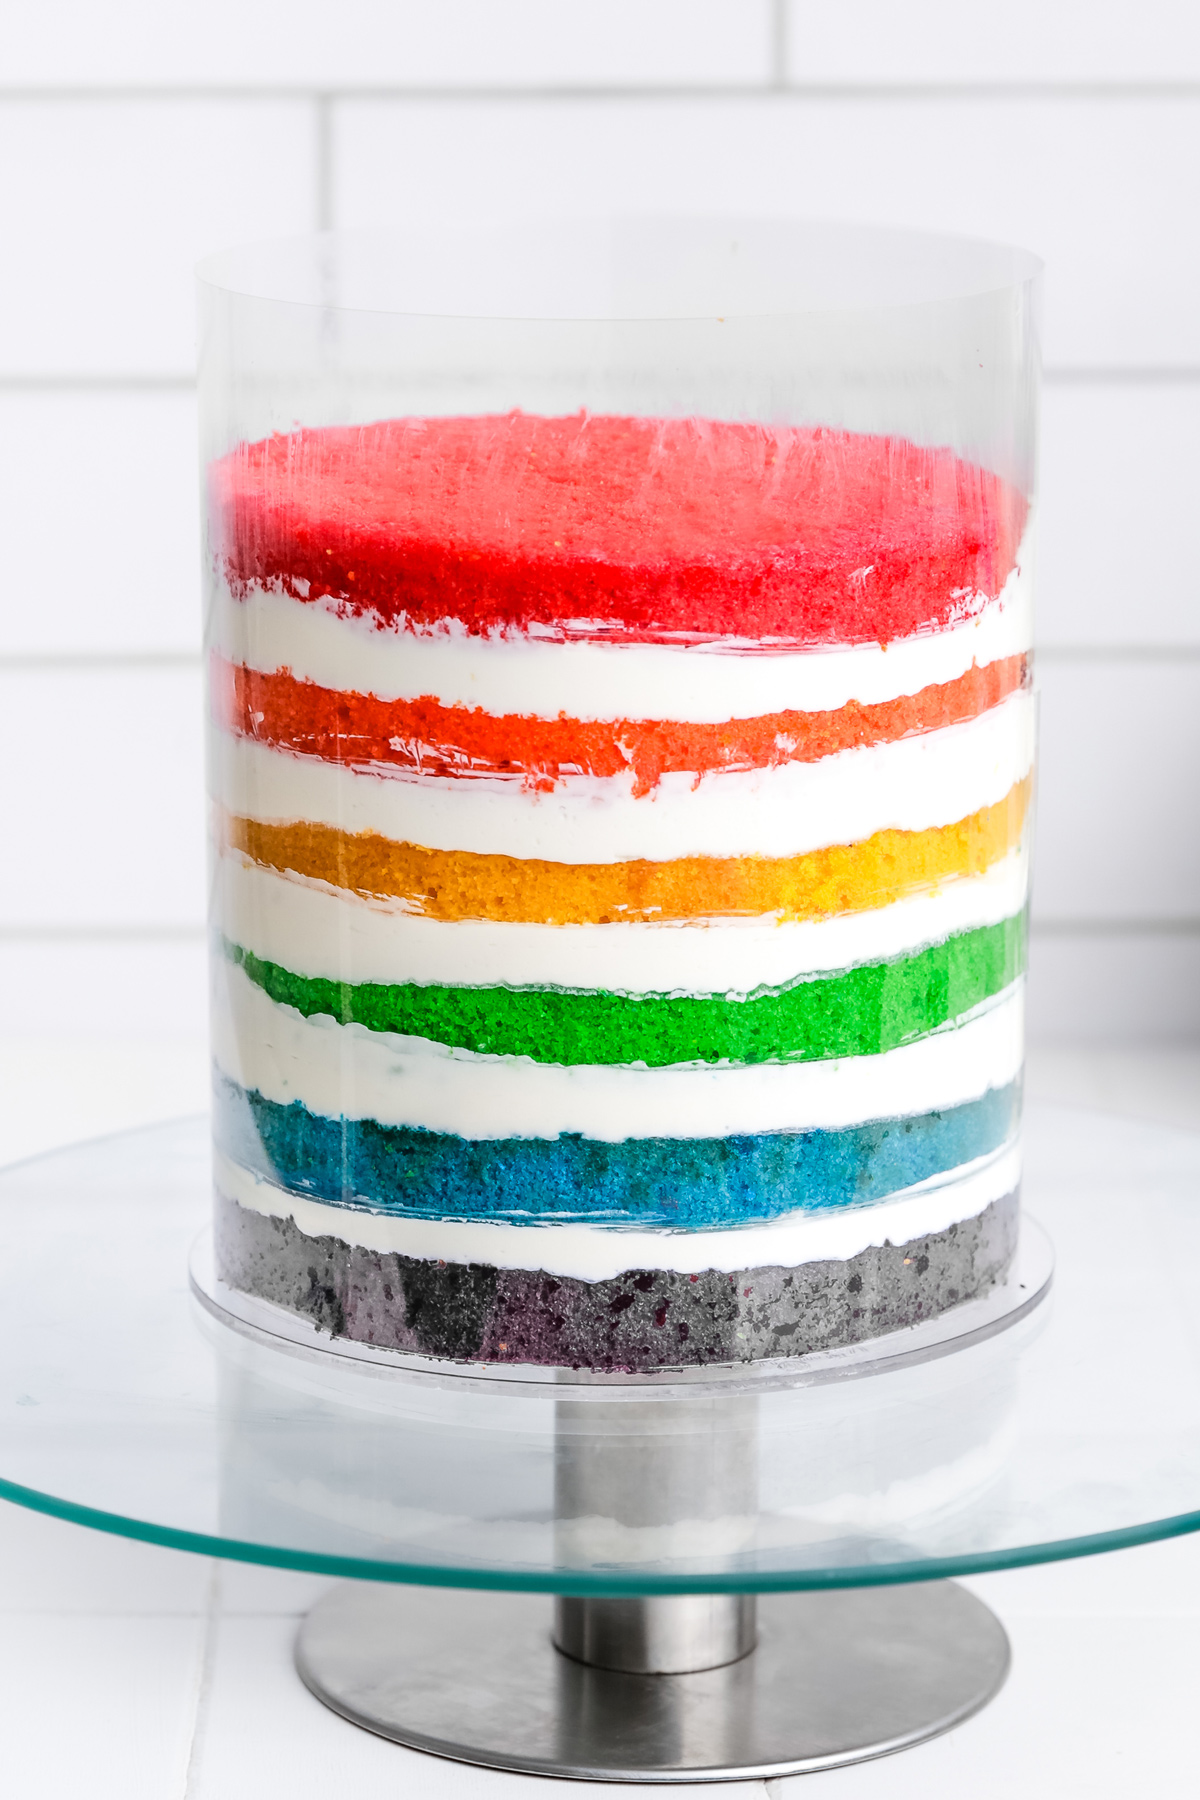
For the filling, I use my mascarpone whipped cream frosting, which keeps the layers light and creamy.
Stack the layers with mascarpone whipped cream, starting with purple and finishing with red.
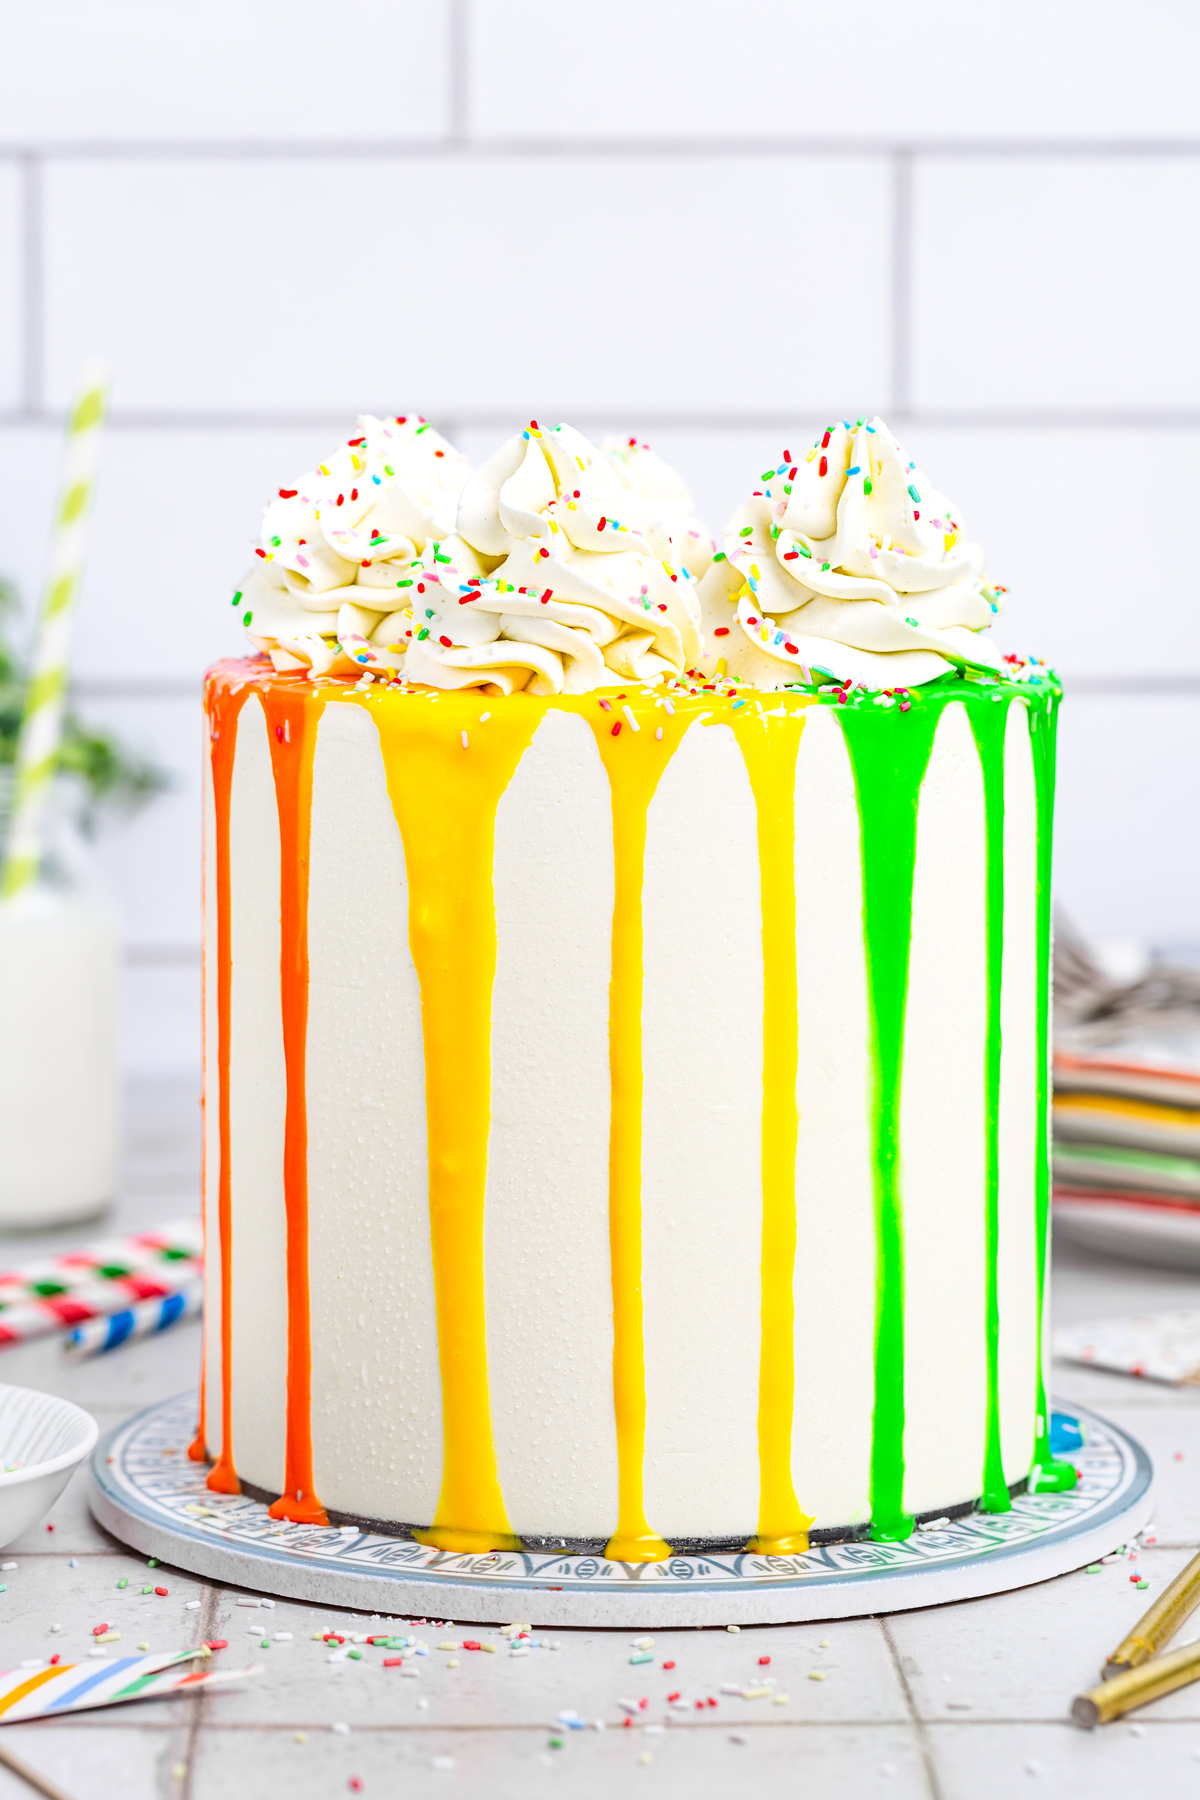
The cake is finished with my vanilla buttercream frosting, smooth and stable for covering and decorating layer cakes.
Frost the entire rainbow layer cake with buttercream and smooth the sides. Chill the cake until the frosting is firm.
Decorate with a colorful white chocolate drip, buttercream swirls, and rainbow sprinkles.
Serving Suggestions
Serve this rainbow cake slightly chilled or at room temperature so the layers stay soft and the buttercream creamy.
This colorful rainbow layer cake is perfect for birthdays, kids parties, and celebration tables, and it looks especially beautiful when sliced to reveal the bright layers.
Storage
Store the rainbow cake in an airtight container in the refrigerator for up to 3 days.
Recipe Variations
- Rainbow cupcakes – Divide the batter into cupcake liners for colorful individual cakes.
- Pastel rainbow cake – Use less food coloring for softer pastel layers.
- Chocolate rainbow cake – Frost with chocolate buttercream instead of vanilla.
- Two-layer rainbow cake – Bake thicker layers for a simpler rainbow birthday cake.
You can also turn this recipe into cupcakes using my rainbow cupcakes version.
Recipe Questions
Can I make rainbow cake ahead of time
Yes, bake the cake layers 1–2 days ahead and assemble the cake before serving.
What frosting works best for rainbow cake
Vanilla buttercream works best for smooth sides, but Swiss buttercream or cream cheese frosting also work well.
How do you keep rainbow cake colors bright
Use gel food coloring and avoid overbaking the cake layers.
More Cake Recipes
I hope you’ll love this recipe. If you try it, feel free to leave a comment. Happy baking!
Print
Rainbow Cake
- Total Time: 1 hour
- Yield: 8 - 10 slices
Description
A colorful rainbow layer cake with six fluffy sponges, filled with light mascarpone whipped cream, covered in buttercream frosting, and decorated with a colorful drip. (For a 6-inch cake – about 8 to 10 servings)
Ingredients
White Cake Layers
- 3 ¼ cups (415 g) cake flour
- 2 ½ tsp (11 g) baking powder
- ¾ tsp (4 g) baking soda
- ½ tsp salt
- 1 cup (225 g) unsalted butter, softened
- 1 ¾ cups (370 g) granulated sugar
- 6 large egg whites (about 210 g)
- 1 ⅓ cups (330 ml) buttermilk
- 3 tsp vanilla extract
- Gel food coloring: red, orange, yellow, green, blue, purple
Mascarpone Whipped Cream Filling
- 7 oz (200 g) mascarpone cheese, chilled
- 1 ¼ cups (300 g) heavy cream, cold
- 3 tbsp powdered sugar
- 1 tsp vanilla extract
Buttercream Frosting
Follow my American Buttercream Frosting recipe
Rainbow Drip
- 4 ¼ oz (120 g) white chocolate, finely chopped
- 3 tbsp (45 ml) heavy cream
- Gel or oil-based food coloring: red, orange, yellow, green, blue, purple
Instructions
For the Cake Layers
- Preheat the oven to 325°F (160°C), convection/fan. Grease and line the bottoms of six 6-inch (15 cm) round cake pans with parchment paper.
- In a large mixing bowl (or the bowl of a stand mixer), beat the softened butter and granulated sugar until light and creamy.
- Add the egg whites gradually along with the vanilla extract, mixing well after each addition until the batter is fluffy.
- Using a spatula, gently fold in the sifted flour, baking powder, baking soda, and salt, alternating with the buttermilk, until the cake batter is smooth and well combined.
- Divide the batter evenly into six bowls using a kitchen scale.
- Tint each portion with gel food coloring (red, orange, yellow, green, blue, violet) and stir until the color is fully incorporated.
- Pour the colored batters into the prepared cake pans and bake for 18–20 minutes, or until a toothpick inserted in the center comes out clean.
- Let the cakes cool in the pans for 5 minutes, then remove and transfer to a wire rack to cool completely.
For the Buttercream Frosting
Prepare the buttercream following my American Buttercream recipe and set aside.
For the Mascarpone Whipped Cream
- In a chilled mixing bowl, whip the cold heavy cream, cold mascarpone, powdered sugar, and vanilla extract together until stiff peaks form.
- Keep refrigerated until ready to assemble.
To Assemble the Layer Cake
- Place the purple sponge layer on a cake board set on a turntable.
- Spread an even layer of mascarpone whipped cream with an offset spatula, then top with the blue sponge.
- Repeat with the green, yellow, and orange layers, finishing with the red layer on top. (Chill for 20 minutes if needed to stabilize.)
- Cover the cake with a thin crumb coat of buttercream frosting, smooth, and refrigerate for 30 minutes.
- Add a second, thicker layer of buttercream, smooth with a cake scraper, and chill until firm to the touch.
For the Drip and Decoration
- Melt the white chocolate and heavy cream together in the microwave or over a double boiler until smooth and fluid.
- Divide into six small bowls, tint with gel food coloring, and let cool to about 86°F (30°C) before using.
- Drip the colorful ganache around the edges of the chilled cake.
- Finish by piping buttercream swirls on top and sprinkling with rainbow sprinkles.
- Serve the rainbow layer cake, or refrigerate and bring to room temperature for at least 30 minutes before slicing.


Notes
Storage: This rainbow cake keeps well for up to 2 days in the refrigerator, covered with a cake dome or stored in an airtight container. Bring it out at least 30 minutes before serving so the cream softens back to the right texture.
Tips:
- The cup measurements are approximate. For best results in baking, always use a kitchen scale instead of relying only on cups.
- Use gel food coloring (brands like Wilton, Americolor, or Rainbow Dust) for vibrant colors that stay bright after baking.
- Weigh each portion of batter to get even, consistent cake layers.
- Level the sponges with a cake leveler or a large serrated knife for a clean assembly.
- Assemble inside a tall acetate cake collar (or a deep cake ring) to keep the layers stable.
- Chill the cake between steps of frosting and decorating—this makes smoothing and adding the drip much easier.
- Prep Time: 40 minutes
- Cook Time: 20 minutes
- Category: cake, layer cake
- Cuisine: American
Leave a Reply