
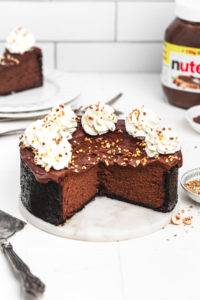
No bake Oreo cheesecake is a creamy cookies and cream cheesecake with an Oreo crust and a smooth no bake filling.
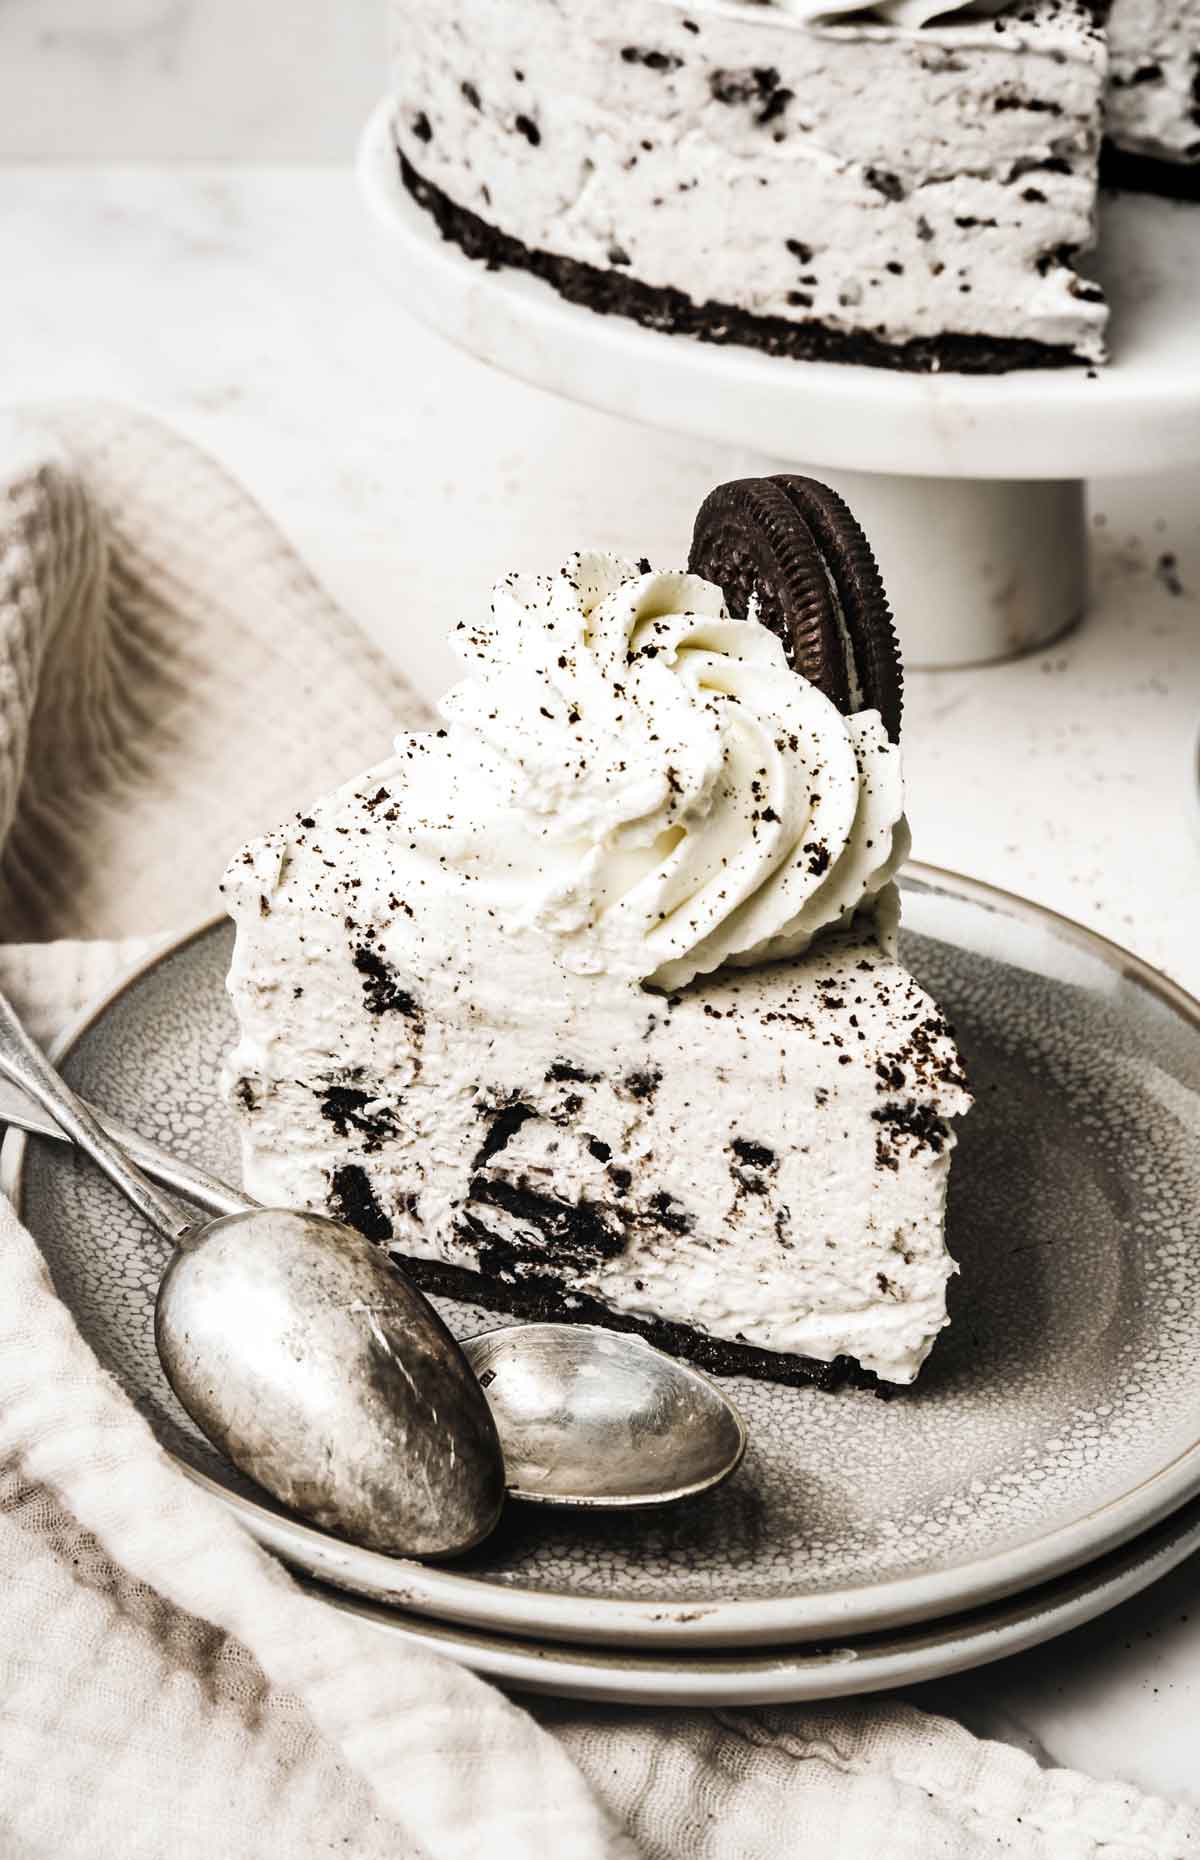
This easy no bake Oreo cheesecake recipe is made with simple ingredients and sets in the fridge for a rich, creamy texture without baking.
With crushed Oreos in both the crust and the filling, this cookies and cream cheesecake is a quick and impressive dessert perfect for any occasion.
This is one of my most reliable no bake cheesecake recipes, tested for a smooth, creamy texture and easy results every time.
Why you'll love this recipe
- No oven needed – just chill and enjoy a rich, creamy Oreo cheesecake in a few easy steps.
- Packed with Oreos – crushed cookies in the crust and in the filling for the ultimate flavor.
- Perfect for any occasion – make it ahead and impress without the stress.
Ingredients for no bake Oreo cheesecake
Here’s everything you need to make this no bake oreo cheesecake recipe with a crunchy Oreo crust and a creamy cheesecake filling.
- Oreo cookies – use classic Oreos for both the crust and the filling.
- Unsalted butter – melted, to bind the crust.
- Cream cheese – full-fat, brick-style for the best texture.
- Granulated sugar – to lightly sweeten the cheesecake.
- Vanilla extract – adds a hint of flavor.
- Heavy cream – cold, to whip into the filling and for topping.
- Powdered sugar – to sweeten the whipped cream.
Tips for this recipe
- Crush the Oreos finely: Use a food processor (or a bag and rolling pin) to get fine crumbs so the Oreo crust holds together well.
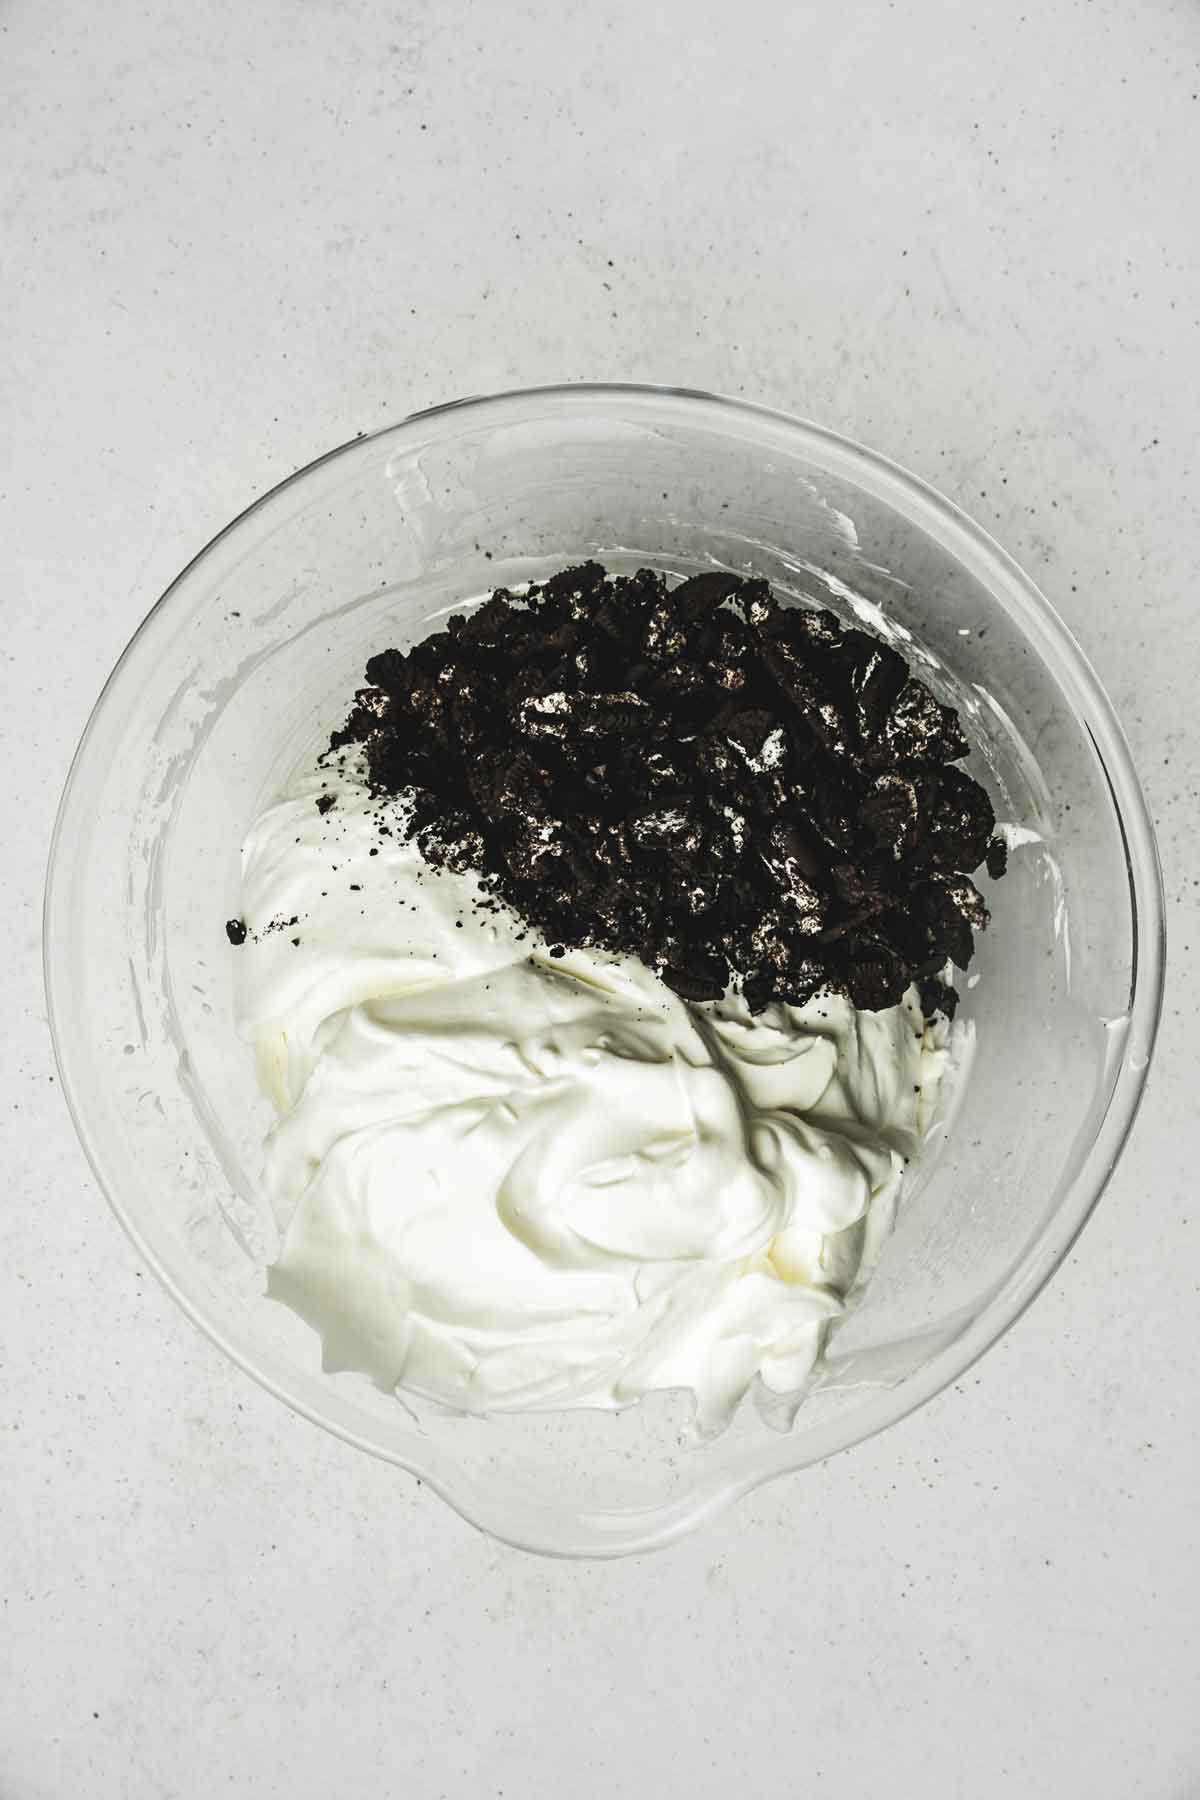
- Fold gently: Slowly fold the whipped cream and Oreo pieces into the cream cheese to keep the filling light and smooth.
- Chill long enough: Let the cheesecake rest in the fridge for at least 4 hours, ideally overnight, for a firm texture.
- Loosen before unmolding: Run a thin knife around the pan edges for clean sides when removing the springform ring.
How to make no bake Oreo cheesecake
Follow these simple steps to make this oreo cheesecake recipe no bake, from the Oreo cookie crust to the creamy filling.
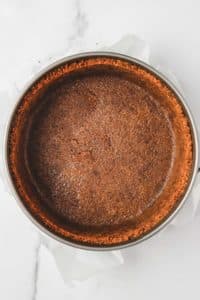
Blend the Oreo cookies into fine crumbs using a food processor. Mix with melted butter in a medium bowl until well combined.

Press the mixture firmly into the bottom of a springform pan to form a compact Oreo crust. Refrigerate for at least 30 minutes.

In a large bowl, beat the cream cheese, granulated sugar, and vanilla extract with a hand mixer for 1–2 minutes until smooth.

Gently fold in cold whipped cream and crushed Oreo cookies using a spatula until fully combined.
Pour the Oreo cheesecake filling over the chilled crust and smooth the top with an angled spatula.

Place in the fridge for at least 4 hours, or overnight for the best texture.

In a medium bowl, whip the cold heavy cream with powdered sugar and vanilla for 2–3 minutes until stiff peaks form.
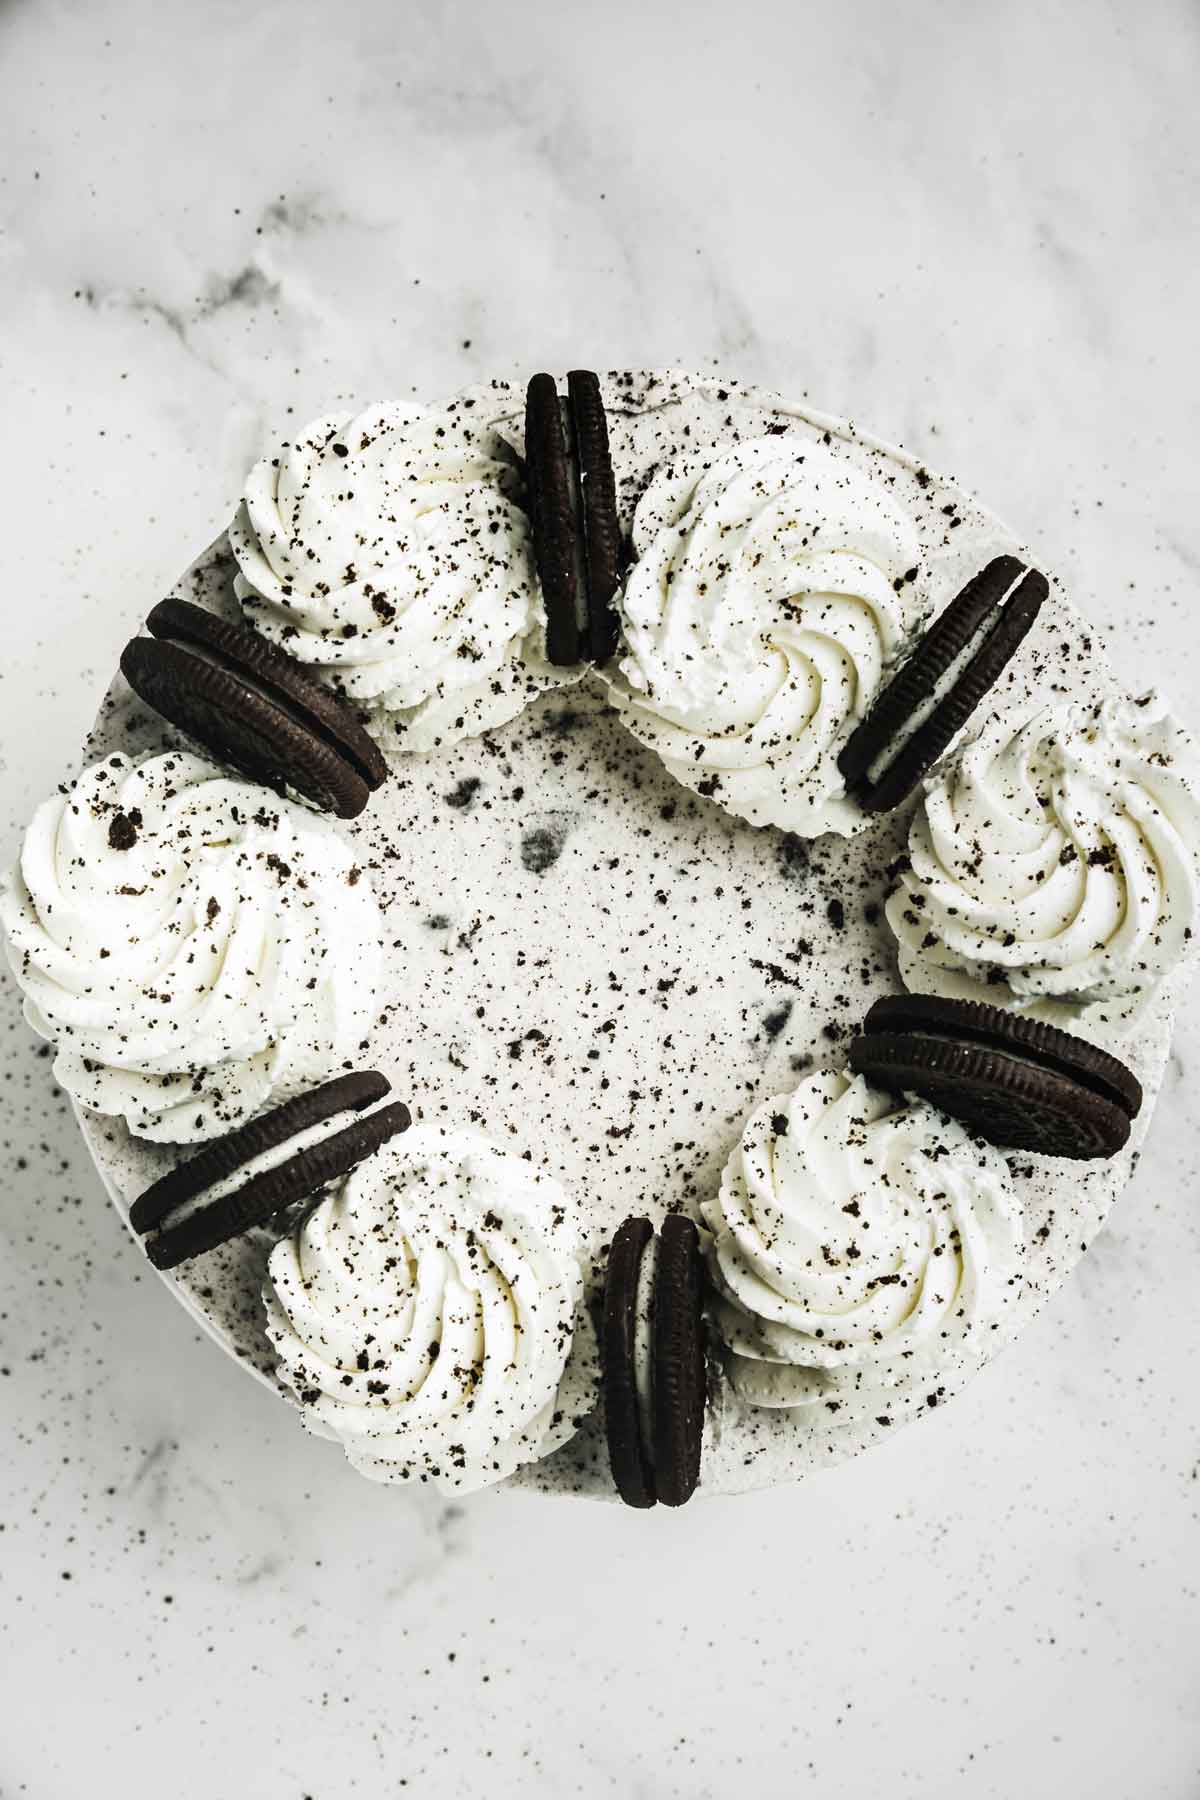
Pipe the whipped cream on top using a piping bag, sprinkle crushed Oreo cookies, and enjoy your no bake Oreo cheesecake!

Recipe Variations
- Cookie crust swaps: Use graham crackers, digestives, or chocolate chip cookies instead of Oreos for a different base.
- Double chocolate: Add melted chocolate to the filling for a richer, more chocolatey Oreo cheesecake.
- Oreo cheesecake bars: Press the crust into a square pan and slice into bars once fully chilled.
- Mini Oreo cheesecakes: Make individual cups in a muffin tin for easy, single-serve portions.
- Baked option: Turn it into a baked cookies-and-cream cheesecake or use the batter for mini baked cheesecakes.
If you prefer a baked version, I also have a Oreo cheesecake that’s just as creamy and easy to make or these Mini Oreo cheesecakes.
More Oreo Recipes
Recipe Questions
What makes this a no bake Oreo cheesecake?
The crust and filling both set in the fridge, so you don’t need to bake anything. It’s a chilled oreo cheesecake no bake dessert that firms up after a few hours in the refrigerator.
Do I need to remove the cream from the Oreos for the crust?
No, keep the cream — it helps bind the crust and adds flavor.
Why won’t my no-bake Oreo cheesecake hold up?
Make sure to use full-fat ingredients and chill it long enough, ideally overnight.
Why is my no-bake cheesecake grainy?
It could be undissolved sugar or overmixing the filling.
Can I make this cheesecake in a pie dish?
Yes! A pie dish works fine — just make sure the crust is pressed evenly.

More cheesecake recipes
I hope you’ll love this recipe. If you try it, feel free to leave a comment. Happy baking!
Print
No Bake Oreo cheesecake
- Total Time: 4 hours 20 minutes
- Yield: 12 slices
Description
Easy no-bake Oreo cheesecake recipe – light and creamy like a mousse, set on a crunchy Oreo cookie crust. (8 -10 inch / 20-25 cm – serves about 10-12)
Ingredients
Oreo Crust :
- 200 g Oreo cookies – about 18–20 cookies
- 50 g (¼ cup) unsalted butter, melted
Oreo Cheesecake filling :
- 450 g (16 oz) full-fat cream cheese - Philadelphia
- 100 g (½ cup) granulated sugar
- 2 teaspoons vanilla extract
- 450 g (1¾ cups) heavy cream, cold and full-fat
- 15 Oreo cookies, roughly chopped
Whipped cream :
- 200 g (1 cup) heavy cream, cold and full-fat
- 2 tablespoons powdered sugar
- 1 teaspoon vanilla extract
Instructions
Oreo crust:
- Blend the Oreo cookies in a food processor until finely ground.
- Melt the butter in the microwave or over a double boiler.
- Combine the Oreo crumbs with the melted butter and mix until fully coated.
- Pour the mixture into the bottom of a 8 or 10 inch springform pan (lined with parchment paper if needed).
- Press the crust evenly into a flat layer using the back of a spoon or glass.
- Chill in the fridge while you prepare the cheesecake filling.
Oreo Cheesecake filling:
- In a large bowl, mix the cream cheese, sugar, and vanilla extract. Beat with an electric mixer until smooth and creamy.
- In a separate bowl, whip the cold heavy cream until stiff peaks form.
- Gently fold the whipped cream and Oreo chunks into the cream cheese mixture using a flexible spatula.
- Pour the mixture over the chilled Oreo crust and smooth the top with an offset spatula.
- Refrigerate for at least 4 hours, or until fully set.
Whipped cream frosting:
- In a bowl, combine the cold heavy cream, powdered sugar, and vanilla extract.
- Beat with an electric mixer on medium speed until stiff and fluffy.
- Carefully unmold the cheesecake.
- Transfer the whipped cream to a piping bag fitted with a decorative tip and pipe swirls on top.
- Garnish with whole Oreo cookies and a sprinkle of crushed Oreos.


Notes
Storage: Store in the refrigerator for up to5 daysin an airtight container. Freeze for up to 3 months. Thaw in the fridge overnight before serving.
Tips:
- Use a kitchen scale for accurate measurements and consistent texture.
- This cheesecake fits an 8 to 10 inch pan and serves 10 to 12 slices depending on thickness.
- Chill overnight for best flavor and structure.
- Speed up chilling by placing the cheesecake in the freezer for 2 hours, then transfer to the fridge. (Check that it’s firm but still creamy.)
- Whip cream cold straight from the fridge to get stiff peaks faster.
- Crush Oreos finely for a compact crust that holds together.
- Prep Time: 20 minutes
- Resting time: 4 hours
- Category: Cheesecake, dessert
- Cuisine: American
Nutrition
- Serving Size: 1 slice
- Calories: 734
- Sugar: 42.4 g
- Sodium: 417.1 mg
- Fat: 50 g
- Carbohydrates: 66.2 g
- Protein: 6.5 g
- Cholesterol: 108 mg


Wattoote
too good cheesecake
Fadela
Yes so good
Midorimei
Excellent recipe!
Simple, easy to make, delicious and the result is great! The cake is beautiful and I don't think it will last long hihi.
As usual, Fadela's recipes are perfect.
Many thanks for sharing <3
Fadela
Oh thank you so much for your feedback ❤️ and for testing this recipe. It's so delicious here too, it didn't last long.
maria
Fedela, this cheesecake is amazing. I just made it and put it to set BUT.. I set it in a Muffin Pan.. and I just now realized I have no clue how to get it out. Besides running a wet knife on the edges, do you think if I stick a fork under, “the cheesecake” will easily be removed?? any other Ideas?? thanks!
Fadela
Hi Maria!
I'm so glad you loved the cheesecake! Since you used a muffin pan, the best way to remove them is to run a warm knife around the edges and then gently lift them out. If they're still sticking, try placing the pan in the freezer for about 15-20 minutes this will help firm them up so they pop out more easily. You can also use a small offset spatula or spoon to carefully loosen the bottom.
Hope that helps! Let me know how it goes!
Miss cuisine
It's so tempting, it's a must-try ^^.
Christina
Did you use the whole cookie for the crust? Or did you scrape the cookie filling off the cookie and used just the cookie part?
Thanks!
Fadela
Hi Christina, yes I use the whole cookies with the cream in the center too .
Oreos-lover
Delicious
Fadela
Thank you very much
Madeira
It looks super good, unfortunately you can't see the quantity, would it be possible to have them?
Fadela
Hello, in the recipe card at the end of the page (just before the comment section)
shaeda aziz
The cheesecake was amazing and we finished din 2 days ............it's perfect thank you for sharing.
Fadela
Thank you so much for your wonderful feedback! I'm thrilled to hear that you enjoyed the cheesecake and finished it in just two days.